Smash Burgers: 5 Secrets for Perfect Crispy Homemade Flavor
Learn how to make crispy, juicy smash burgers with our easy, 20-minute recipe perfect for family meals. Get the recipe today.
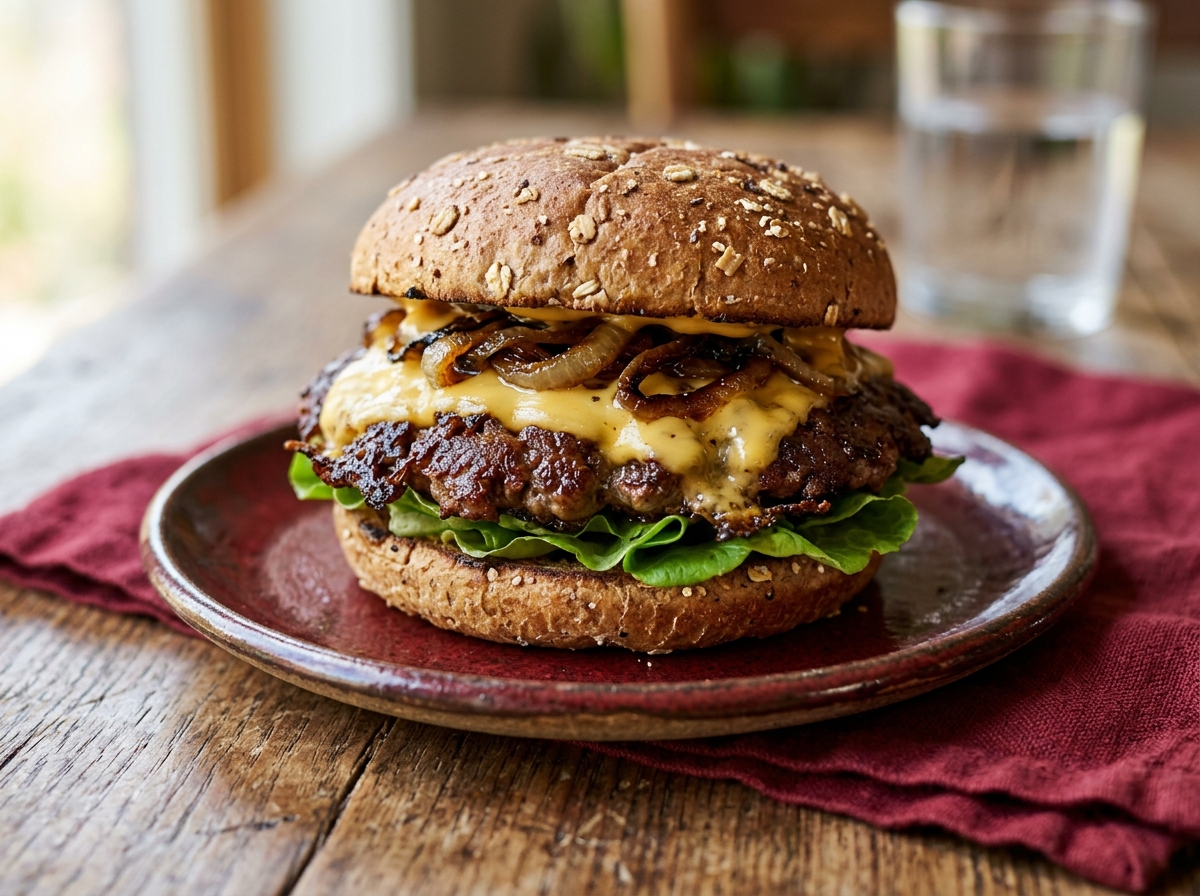
Nothing beats the irresistible sizzle and aroma of smash burgers hitting a blazing hot surface. These thin, crispy-edged patties deliver maximum flavor in every single bite. The secret lies in the aggressive smashing technique that creates those coveted caramelized edges while keeping the center juicy and tender.
The beauty of this cooking method transforms ordinary ground beef into restaurant-quality perfection. You’ll discover that achieving professional results at home requires just a few key techniques and the right equipment setup. Once you master the fundamentals, you’ll never want to go back to thick, boring burgers again.
Introduction to Smash Burgers
The smash burger technique revolutionizes how we approach burger cooking at home. Unlike traditional thick patties that can turn dry and dense, this method creates incredibly thin patties with maximum surface area contact. The aggressive pressing action develops the Maillard reaction faster, producing those signature crispy, caramelized edges that burger enthusiasts crave.
What Makes Smash Burgers Special
The magic happens when raw ground beef meets screaming hot metal. The intense heat combined with firm pressure creates a thin, irregular patty with incredible texture contrast. You get crispy, lacy edges surrounding a tender, juicy center that’s impossible to achieve with thick burger methods.
This technique maximizes the beef-to-bun ratio while ensuring every bite delivers concentrated flavor. The thin profile also means faster cooking times, making it perfect for weeknight dinners or entertaining crowds. Professional burger joints have embraced this method because it consistently produces superior taste and texture.
History and Popularity
The smash burger concept originated in Midwest diners during the early 1900s. Busy short-order cooks discovered that pressing down on patties with a spatula created better-tasting burgers in less time. This practical technique eventually evolved into the refined method we use today.
Modern food science explains why this works so well. The increased surface contact with the cooking surface accelerates browning reactions while the steam created during smashing helps cook the patty evenly. Today’s burger enthusiasts have rediscovered this technique, making it a cornerstone of quality home cooking.
Ingredients and Equipment Needed
Success with how to make smash burgers starts with selecting premium ingredients and having the right tools. Quality ground beef forms the foundation, while proper equipment ensures you achieve professional-level results. Let’s break down exactly what you need for the perfect setup.
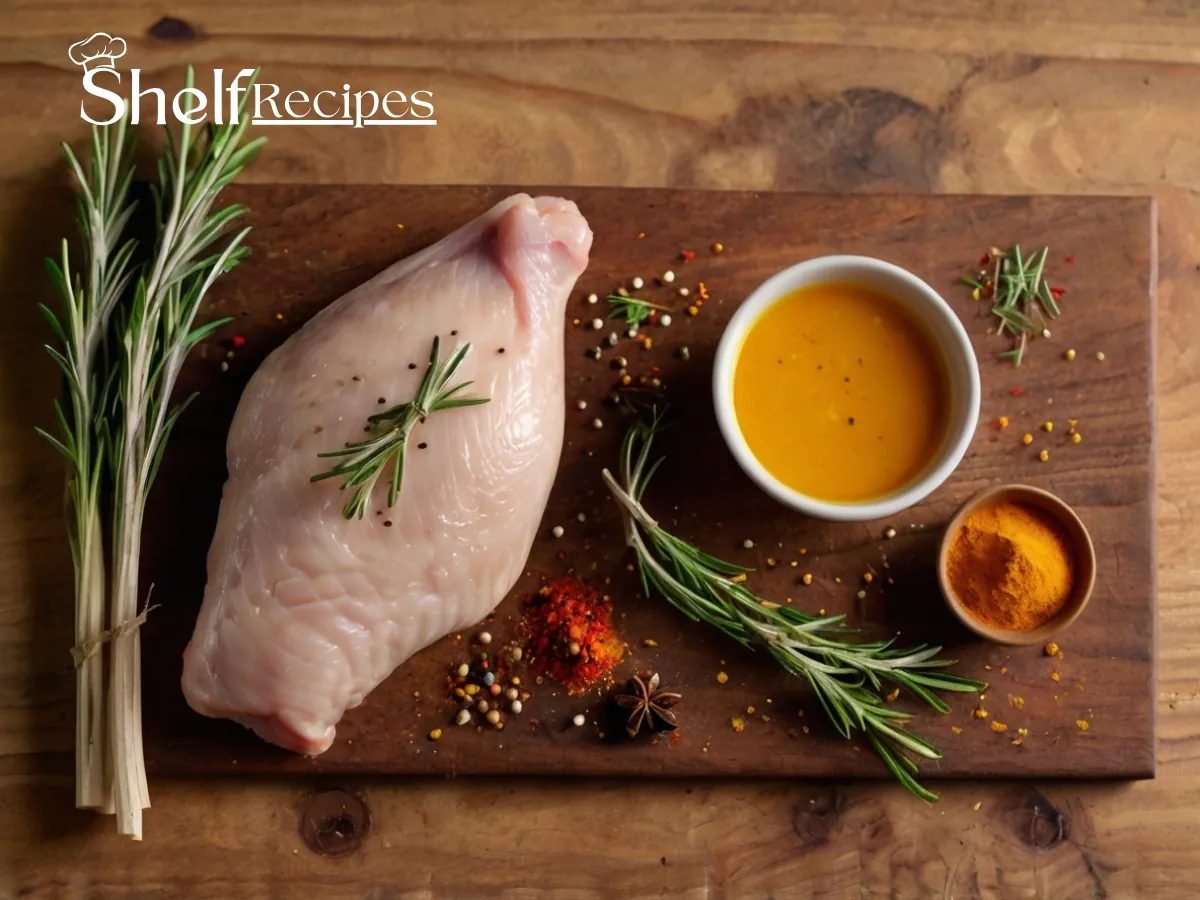
Choosing the Right Meat and Buns
Ground beef with 80/20 fat ratio delivers the ideal balance of flavor and juiciness for smash burgers. Look for halal-certified options from trusted suppliers to ensure quality and dietary compliance. The higher fat content prevents the thin patties from drying out during the aggressive cooking process.
Avoid lean ground beef (90/10 or 93/7) as it lacks sufficient fat for proper texture development. Fresh ground beef works better than frozen because it smashes more easily and creates better edge caramelization. Purchase from butchers who grind beef daily for maximum freshness and flavor.
For buns, choose sturdy options that won’t fall apart under the juicy patty weight:
- Brioche buns for rich, buttery flavor and excellent structural integrity
- Potato rolls for soft texture that complements crispy patty edges
- Sesame seed buns for classic diner-style presentation and taste
- Martin’s Famous Potato Rolls for professional-grade consistency
Essential Equipment for Best Results
A heavy-bottom cast iron skillet or flat-top griddle provides the thermal mass needed for proper searing. Cast iron retains heat exceptionally well, ensuring consistent temperature even when cold meat hits the surface. For indoor cooking, a 12-inch cast iron skillet accommodates multiple patties while maintaining even heat distribution.
The burger press or spatula setup determines your smashing success. A wide, flat spatula with a sturdy handle gives you maximum leverage for aggressive pressing. Some cooks prefer dedicated burger presses, but a regular spatula paired with a second spatula for extra pressure works perfectly.
Essential tools for cast iron smash burger preparation include:
- Heavy cast iron skillet (12-inch minimum) or griddle
- Wide, flat metal spatula with comfortable grip
- Kitchen scale for consistent patty portions
- Parchment paper squares to prevent sticking during forming
- Meat thermometer for safety verification
Step-by-Step Guide to Making Smash Burgers
Mastering the best smash burger recipe technique requires understanding timing, temperature, and pressure application. Each step builds toward creating those signature crispy edges while maintaining juicy centers. The key lies in working quickly and confidently once the cooking process begins.
Preparing Your Patties
Start by dividing your ground beef into 3-4 ounce portions using a kitchen scale for consistency. Roll each portion into a loose ball without overworking the meat. Gentle handling preserves the beef’s natural texture and prevents tough, dense patties.
Place the beef balls on parchment paper squares to prevent sticking to your prep surface. Season the outside lightly with salt and pepper just before cooking. Avoid seasoning too far in advance, as salt draws out moisture that you want to retain during the smashing process.
Keep the formed patties refrigerated until ready to cook. Cold meat smashes better and creates more defined crispy edges when it hits the hot surface. Room temperature meat tends to stick to the spatula and doesn’t develop the same textural contrast.
Proper Smashing Technique for Crispy Edges
Heat your cast iron skillet over medium-high heat until it’s smoking hot. A properly heated surface ensures immediate searing and prevents the meat from sticking. Test the temperature by flicking a few drops of water onto the surface – they should sizzle and evaporate immediately.
Place the beef ball onto the hot surface and immediately press down firmly with your spatula. Use your other hand to add extra pressure, smashing the patty as thin as possible. Hold the pressure for 10-15 seconds to ensure maximum surface contact and edge development.
The smashing creates irregular, lacy edges that become incredibly crispy during cooking. Don’t worry about perfect round shapes – the uneven edges are what make crispy smash burgers so delicious. Once smashed, resist the urge to move or press the patty again.
Cooking Temperature and Timing
Cook the first side for 2-3 minutes without disturbing the patty. You’ll hear aggressive sizzling as the edges caramelize and the Maillard reaction develops. The edges should appear dark brown and crispy when ready to flip.
Flip carefully with a thin spatula, scraping up any crispy bits stuck to the pan. Cook the second side for 1-2 minutes for medium doneness. Add cheese during the last 30 seconds of cooking, covering with a lid to encourage melting.
Internal temperature should reach 160°F for food safety compliance. The thin profile cooks quickly, so monitor closely to prevent overcooking. Remove from heat immediately once the proper temperature is achieved to maintain juiciness.
Smash Burger Sauce and Seasoning
The right sauce elevates your homemade smash burgers from good to extraordinary. A well-crafted sauce balances richness, acidity, and umami to complement the beef’s intense flavor. Understanding seasoning timing and application also makes a significant difference in the final taste profile.
Homemade Sauce Recipe
The classic smash burger sauce combines mayonnaise, ketchup, and pickle relish for a tangy, creamy base. This simple combination provides the perfect counterpoint to rich, beefy flavors while adding moisture to balance the crispy texture. Quality ingredients make all the difference in the final result.
Enhanced versions incorporate Dijon mustard for sharpness and garlic powder for depth. Some recipes add a touch of smoked paprika or onion powder to complement the beef’s natural savory notes. The key is balancing sweet, sour, and umami elements without overpowering the meat.
Popular sauce variations include:
- Classic: mayonnaise, ketchup, sweet pickle relish, yellow mustard
- Smoky: add smoked paprika and garlic powder to the classic base
- Spicy: incorporate hot sauce or cayenne pepper for heat
- Herb-forward: mix in fresh chives and dried oregano
Seasoning Blends to Enhance Flavor
Simple salt and black pepper form the foundation of excellent smash burger seasoning. Apply seasoning just before cooking to prevent drawing out moisture from the meat. Coarse kosher salt provides better adhesion and more pronounced flavor than fine table salt.
Garlic powder and onion powder add savory depth without competing with the beef’s natural taste. These dried aromatics distribute evenly and don’t burn during the high-heat cooking process. Avoid fresh garlic, which can char and turn bitter on the hot surface.
Advanced seasoning combinations enhance complexity without overwhelming the meat:
- Umami blend: salt, pepper, garlic powder, mushroom powder
- Smoky blend: salt, pepper, smoked paprika, chipotle powder
- Classic diner: salt, pepper, onion powder, dried oregano
- International twist: salt, pepper, cumin, coriander
Perfect Crispy Smash Burgers
Equipment
- Cast Iron Skillet or Heavy-Bottom Pan
- Wide Metal Spatula
- Burger Press or Large Spoon
- Kitchen Scale
- Parchment paper
- Instant-Read Thermometer
Ingredients
- 1 lb Halal-Certified Ground Beef 80/20 blend, cold from refrigerator (450g)
- 1 tsp Kosher Salt for seasoning
- 1/2 tsp Black Pepper freshly ground
- 1 tbsp Neutral Oil avocado or vegetable oil
- 4 Whole Grain Burger Buns brioche or potato buns, halved
- 4 slices Natural Cheese American or cheddar, halal-certified
- 1 medium White Onion thinly sliced
- 2 cups Butter Lettuce organic, leaves separated
- 1 large Tomato organic, sliced 1/4-inch thick
- 1/2 cup Mayonnaise halal-certified
- 2 tbsp Ketchup organic, no high fructose corn syrup
- 1 tbsp Yellow Mustard Dijon preferred
- 1 tsp Apple Cider Vinegar raw, unfiltered
- 1/2 tsp Garlic Powder
- 1/4 tsp Onion Powder
Instructions
- Remove ground beef from refrigerator and divide into 4 equal portions (about 4 oz/115g each). Gently roll into loose balls without overworking the meat. Place on parchment paper and refrigerate until ready to cook.
- Make the signature sauce by whisking together mayonnaise, ketchup, mustard, apple cider vinegar, garlic powder, and onion powder in a small bowl. Refrigerate until serving.
- Prepare all toppings: slice onions into thin rings, wash and dry lettuce leaves, and slice tomatoes. Toast buns lightly if desired.
- Heat cast iron skillet or heavy-bottom pan over medium-high heat for 3-4 minutes. Add oil and swirl to coat evenly. The pan should be hot enough that a drop of water sizzles immediately (about 375°F/190°C).
- SECRET #1: Place beef balls in pan with space between each. Immediately smash down firmly with spatula or burger press for 10-15 seconds, creating thin patties about 1/4-inch thick. The thinner, the crispier the edges will become.
- SECRET #2: Season the raw side generously with salt and pepper while the bottom sears. Do not move or flip for 2-3 minutes until deep golden crust forms and edges are crispy.
- SECRET #3: Flip burgers only once when you can easily slide spatula underneath without resistance. Cook for additional 1-2 minutes until internal temperature reaches 160°F (71°C).
- SECRET #4: Add cheese slices during the last 30 seconds of cooking and cover pan briefly to melt. Remove patties and let rest for 1 minute.
- SECRET #5: Spread homemade sauce on both bun halves. Layer bottom bun with lettuce, tomato, crispy smash patty with melted cheese, and onion rings.
- Crown with top bun and gently press down. Serve immediately while patties are hot and cheese is melty for the ultimate smash burger experience.
Notes
The key to perfect smash burgers is using cold meat and a screaming hot pan. Never press down after the initial smash as this releases juices. TEMPERATURE GUIDELINES:
Pan should reach 375°F (190°C) before adding meat. Internal temperature must reach 160°F (71°C) for food safety. MAKE-AHEAD:
Sauce can be prepared up to 3 days in advance. Beef balls can be formed 2 hours ahead and refrigerated. SCALING:
For larger batches, work in batches of 4 patties maximum to maintain proper pan temperature and avoid overcrowding. TROUBLESHOoting:
If patties stick to pan, the surface isn't hot enough or needs more oil. If edges aren't crispy, smash thinner and ensure pan is properly preheated.
Nutrition Highlights (Per Serving – Approximate)
Understanding your food’s composition is key to balanced eating. Here is an approximate nutritional breakdown calculated for a standard serving based on wholesome preparation guidelines:
Culinary Selection Notes
- Adjusting sweetener densities or using refined-sugar alternatives will directly optimize the overall glycemic load without breaking structural balance.
- Focusing on high-quality whole fats maximizes trace micronutrient retention across low-temperature or baking environments.
Tips and Troubleshooting
Even experienced cooks encounter challenges when perfecting their easy smash burgers technique. Understanding common issues and their solutions helps you consistently achieve professional results. The key lies in identifying problems early and making quick adjustments during the cooking process.
Common Issues and Fixes
Patties sticking to the spatula during smashing usually indicates insufficient heat or overworked meat. Ensure your cooking surface reaches proper temperature before starting, and handle the ground beef as little as possible during formation. Cold meat from the refrigerator also releases more easily from the spatula.
Uneven browning often results from inconsistent surface contact or temperature variations across the pan. Press firmly and evenly during the smashing process, ensuring the entire patty makes contact with the cooking surface. Cast iron provides more consistent heat distribution than thin pans.
Common problems and quick solutions:
- Dry patties: increase fat content to 80/20 ratio or reduce cooking time
- Soggy buns: toast cut sides lightly before assembly
- Bland flavor: season more generously and use fresh ground beef
- Falling apart: don’t overwork the meat during forming
Tips for Cooking Indoors
Indoor cooking requires proper ventilation due to the high-heat technique producing smoke and splatter. Turn on your exhaust fan to maximum and open windows if possible. The aggressive searing creates aromatic compounds that can linger without adequate air circulation.
A well-seasoned cast iron skillet performs better than stainless steel for indoor quick smash burgers. The seasoned surface provides natural non-stick properties while maintaining consistent temperature. Preheat the pan gradually to prevent warping and ensure even heating.
Splatter control becomes essential in kitchen environments. Use a splatter screen to contain grease while maintaining proper heat circulation. Clean your stovetop immediately after cooking to prevent grease buildup that can affect future cooking sessions.
Serving Suggestions and Variations
Creative burger toppings and presentation elevate your smash burgers from simple meals to memorable dining experiences. The key is balancing textures, flavors, and colors while maintaining structural integrity. Consider how each element complements the crispy-edged patty and rich sauce.
Toppings and Presentation Ideas
Classic American toppings include crisp lettuce, ripe tomatoes, and sharp cheddar cheese. These traditional elements provide textural contrast and balanced flavors that complement the beef without overwhelming it. Fresh ingredients make a noticeable difference in both taste and visual appeal.
Elevated combinations incorporate caramelized onions, crispy bacon, and aged cheeses for sophisticated flavor profiles. Pickled vegetables add acidic brightness that cuts through rich beef fat. Consider seasonal vegetables like roasted peppers or fresh avocado for variety.
Creative topping combinations to try:
- Classic: lettuce, tomato, onion, cheddar, pickles
- Gourmet: arugula, heirloom tomatoes, gruyere, caramelized onions
- Loaded: double cheese, crispy onions, extra sauce, lettuce
- Fresh: cucumber, sprouts, herb mayo, swiss cheese
Family-Friendly and Kid-Involved Cooking
Children can safely participate in burger preparation through age-appropriate tasks. Younger kids can help form loose meat balls while older children learn proper seasoning techniques. This hands-on involvement builds cooking confidence and family bonding opportunities.
Create mini versions using 2-ounce portions for smaller appetites. Double smash burger combinations work well for hungry teenagers and adults. Let family members customize their own toppings bar-style for personalized meals that satisfy everyone’s preferences.
Safety considerations include keeping children away from the hot cooking surface and teaching proper hand washing after handling raw meat. Assign specific roles that match each child’s age and skill level for successful family cooking sessions.
Storage, Reheating, and Meal Prep
Proper storage techniques preserve the quality and safety of your prepared burgers. Understanding the best methods for reheating maintains texture while ensuring food safety compliance. Strategic meal prep approaches save time during busy weeknights while maintaining fresh flavors.
Best Practices for Leftovers
Refrigerate cooked patties within two hours of cooking, storing them separately from buns and toppings. Wrap individual patties in aluminum foil or place in airtight containers to prevent moisture loss. Properly stored cooked patties maintain quality for 3-4 days in the refrigerator.
Freezing extends storage to 2-3 months when wrapped tightly in freezer-safe packaging. Layer parchment paper between patties to prevent sticking during frozen storage. Label containers with dates to maintain proper rotation and food safety practices.
Reheat refrigerated patties in a skillet over medium heat for 2-3 minutes per side. This method restores some crispiness to the edges while heating evenly throughout. Avoid microwave reheating, which creates soggy textures and uneven heating patterns.
Make-Ahead Strategies
Form raw patties up to 24 hours in advance, storing them on parchment-lined plates in the refrigerator. This prep work saves significant time during meal preparation while maintaining meat quality. Keep patties covered to prevent surface drying and cross-contamination.
Prepare sauce components ahead of time, combining ingredients and storing in refrigerated containers. Most burger sauces improve in flavor after several hours as ingredients meld together. Fresh herb additions work best when added just before serving.
Efficient meal prep strategies include:
- Pre-form patties and freeze individually for quick weeknight meals
- Prep sauce batches and portion into small containers
- Pre-slice vegetables and store in airtight containers
- Toast buns in batches and freeze for later use
Consider trying our Burger King Whopper recipe for another delicious homemade burger variation. You might also enjoy our ultimate great burger guide for additional techniques. Pair your burgers with our refreshing cucumber salad for a complete meal.