Samosa Recipe: 7 Foolproof Secrets for Crispy Homemade Samosas
Learn how to make perfectly crispy samosa with our easy 7-step recipe. Enjoy flaky, savory delights. Get the recipe and start cooking today.
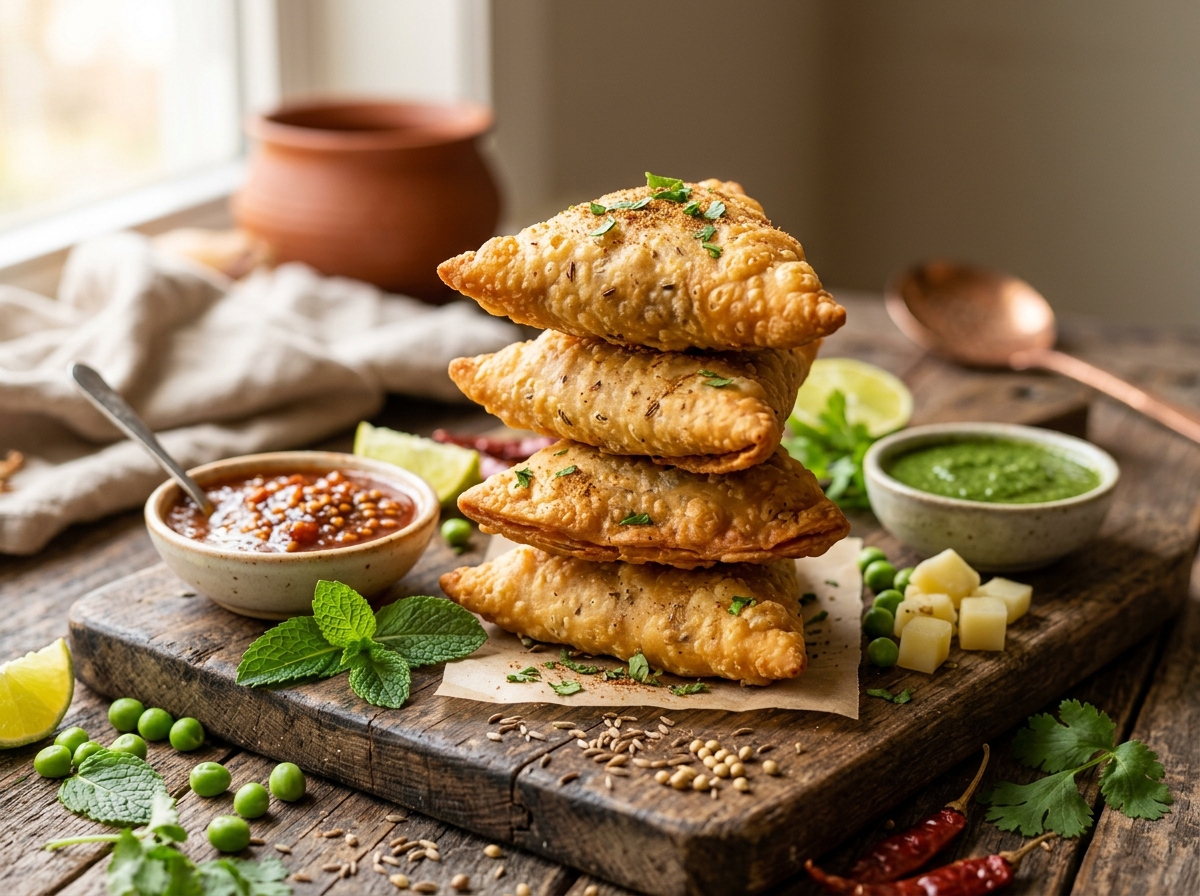
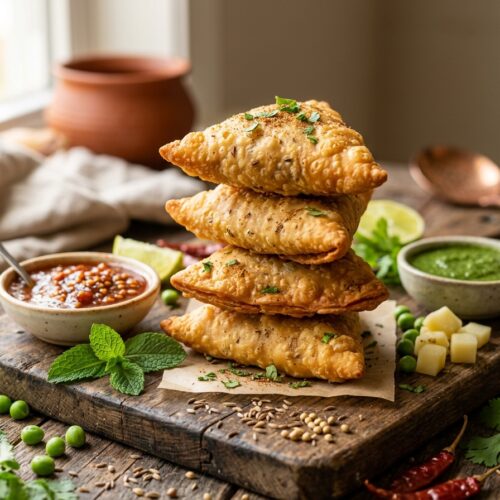
Nothing beats the satisfying crunch of a perfectly crafted samosa, with its golden exterior giving way to aromatic, spiced filling within. These triangular parcels of joy have captured hearts across continents, transforming simple ingredients into an irresistible snack that brings families together around the kitchen table. Whether you’re craving the classic potato filling or exploring creative variations, mastering this beloved recipe opens doors to countless culinary adventures.
The magic happens when that first bite releases the fragrant steam of cumin, coriander, and garam masala, while the crispy shell provides the perfect textural contrast. Each samosa tells a story of careful folding, precise seasoning, and the ancient art of creating something extraordinary from humble pantry staples.
Introduction to Samosa
What is a Samosa?
A samosa is a triangular pastry pocket filled with savory ingredients, traditionally wrapped in a thin, unleavened dough and deep-fried until golden brown. The outer shell achieves its signature crispiness through a carefully balanced dough that contains just enough oil or ghee to create layers without becoming greasy. Inside, the filling typically combines spiced potatoes, peas, onions, and aromatic herbs that meld together during the cooking process.
The geometric precision of a well-folded samosa isn’t just aesthetic—it serves functional purposes too. The triangular shape ensures even heat distribution during frying, while the sealed edges prevent filling from escaping and oil from penetrating the interior. This engineering marvel of street food demonstrates how traditional cooking techniques optimize both flavor and structure.
Cultural Significance and Popularity
Originally believed to have traveled from Central Asia through trade routes, the samosa has become deeply embedded in South Asian cuisine and beyond. Each region has developed its own signature variations, from the larger Punjabi samosa filled with spiced potatoes to smaller cocktail versions perfect for parties. The preparation often becomes a communal activity, with families gathering to fold dozens at once for special occasions.
Modern variations have expanded far beyond traditional boundaries, incorporating everything from cheese and corn to quinoa and roasted vegetables. This adaptability speaks to the fundamental appeal of the concept—a portable, self-contained meal that can be customized to any dietary preference or flavor profile.
Ingredients for Perfect Samosa
Dough Ingredients and Preparation
The foundation of exceptional samosas lies in achieving the right dough consistency—neither too stiff nor too soft. All-purpose flour forms the base, while a small amount of oil or melted ghee creates the flaky layers that make each bite so satisfying. The key lies in the hydration level: too much water creates a tough shell, while too little makes the dough difficult to roll and prone to cracking.
Temperature plays a crucial role in dough development. Using slightly warm water helps activate the gluten just enough to provide structure without making the pastry chewy. A pinch of salt enhances flavor while also strengthening the gluten network, creating a more resilient wrapper that won’t tear during the folding process.
Traditional and Alternative Fillings
Classic potato filling combines boiled potatoes with a carefully balanced spice blend including cumin seeds, coriander powder, and garam masala. The potatoes should be cooked until just tender—overcooking creates a mushy texture that can make the samosas soggy. Green peas add sweetness and textural contrast, while finely chopped ginger and green chilies provide aromatic heat.
For those seeking variety, chicken samosa fillings require pre-cooking the meat with aromatic spices until tender and dry. Vegetable samosa options might include spiced cauliflower, carrots, or even paneer for added protein. The key principle remains consistent: all moisture must be cooked out of the filling to prevent soggy pastries and ensure proper crisping during the frying process.
Step-by-Step Samosa Making Process
Making the Dough with Texture Tips
Begin by combining flour and salt in a large mixing bowl, creating a well in the center for the liquid ingredients. Gradually incorporate the oil and water, mixing with a fork initially to prevent lumps from forming. The dough should come together without being sticky—if it feels too dry, add water one teaspoon at a time until it reaches the proper consistency.
Kneading technique dramatically affects the final texture of your samosa wrapper. Work the dough for 8-10 minutes until it becomes smooth and elastic, then cover with a damp cloth and rest for at least 30 minutes. This resting period allows the gluten to relax, making the dough easier to roll thin without snapping back.
Preparing the Filling (Potato, Vegetable, Chicken)
Proper filling preparation starts with achieving the right moisture content in your ingredients. Boiled potatoes should be cooled completely before mashing to prevent steam from creating excess moisture. Break them into small, uniform pieces rather than creating a smooth puree—this maintains interesting texture and prevents the filling from becoming gluey.
Tempering spices in oil releases their essential oils and creates deeper flavor penetration throughout the filling. Heat oil in a heavy-bottomed pan, add whole spices like cumin seeds first, followed by ground spices in order of their heat tolerance. This layered approach ensures each component contributes its full flavor potential to the finished samosa.
Folding and Shaping Techniques with Visual Guidance
The samosa folding technique requires patience but becomes second nature with practice. Roll each dough portion into a thin oval, then cut in half to create two semi-circles. Form a cone by bringing one corner of the straight edge to meet the curved edge, overlapping slightly to prevent gaps where filling might escape.
Filling the cone requires restraint—overstuffing leads to bursting during frying, while underfilling creates disappointing bites. Fill the cone about two-thirds full, leaving enough dough at the top to seal properly. Brush the edges lightly with water before pressing firmly to create a secure seal that won’t open during cooking.
Frying to Crispy Perfection (Oil Temperature and Timing)
Oil temperature control makes the difference between soggy and crispy samosas. Heat oil to 350°F (175°C)—hot enough to create immediate sizzling when samosas are added, but not so hot that the outside browns before the inside heats through. A simple test involves dropping a small piece of dough into the oil; it should rise to the surface within 2-3 seconds.
Fry samosas in small batches to maintain consistent oil temperature and ensure even browning. Turn them gently once the bottom side achieves golden brown color, typically after 3-4 minutes. The entire frying process should take 6-8 minutes, resulting in an evenly crispy exterior and perfectly heated interior.
Tips and Variations
Baking and Air Fryer Options for Healthier Samosas
Baked samosas offer a lighter alternative without sacrificing flavor, though the texture differs from traditional fried versions. Brush assembled samosas lightly with oil or melted ghee before baking at 400°F (200°C) for 20-25 minutes, turning once halfway through. This method produces a golden, crispy exterior while reducing oil content significantly.
Air fryer preparation delivers results closest to traditional frying with minimal oil use. Preheat the air fryer to 375°F (190°C) and cook samosas for 12-15 minutes, shaking the basket every 5 minutes for even browning. The circulating hot air creates excellent crisping while maintaining the tender filling texture that makes samosas so appealing.
Halal and Dietary-Friendly Ingredient Alternatives
Creating inclusive samosa recipes means considering various dietary restrictions without compromising flavor. Replace traditional ghee with neutral vegetable oil or vegan butter alternatives for dairy-free versions. For gluten-free options, substitute all-purpose flour with a blend of rice flour and tapioca starch, though the texture will be slightly different from wheat-based dough.
Protein variations can accommodate different dietary preferences while maintaining authentic flavors. Lentil-based fillings provide substantial nutrition for vegetarian diets, while ensuring all meat options come from certified halal sources maintains religious compliance. Creative combinations like spiced chickpeas or roasted vegetables expand the appeal to health-conscious cooks seeking nutritious alternatives.
Storage and Serving
How to Store Samosas Properly
Proper storage techniques preserve both texture and flavor for several days when handled correctly. Allow freshly cooked samosas to cool completely before storing to prevent condensation from making them soggy. Layer them in airtight containers with parchment paper between layers to prevent sticking and maintain their shape.
Room temperature storage works for same-day consumption, but refrigeration extends shelf life to 3-4 days when stored properly. Keep them in the main body of the refrigerator rather than the door, where temperature fluctuations can affect quality. For optimal texture retention, store fried and baked versions separately, as they have different moisture levels.
Freezing and Reheating Instructions
Freezing samosas successfully requires proper preparation to maintain quality during storage. Arrange cooled samosas on a baking sheet without touching, freeze until solid, then transfer to freezer bags with all air removed. This prevents them from sticking together while protecting against freezer burn for up to three months.
Reheating techniques vary depending on your desired final texture and available time. Oven reheating at 350°F (175°C) for 10-12 minutes restores crispiness most effectively, while microwave heating offers convenience but may result in softer exteriors. For frozen samosas, thaw completely before reheating to ensure even warming throughout.
Serving Suggestions including Popular Chutneys
Traditional accompaniments enhance the samosa experience through complementary flavors and textures. Mint chutney provides cooling contrast to spiced fillings, while tamarind chutney adds sweet-tangy complexity that balances rich, savory notes. These chutneys can be prepared ahead and stored refrigerated for up to a week.
Modern serving ideas expand beyond traditional presentations to suit various occasions. Arrange samosas on platters with small bowls of different chutneys for party presentations, or serve individually plated with salad garnishes for more formal meals. The versatility makes them suitable for everything from casual snacking to elegant appetizer courses.
Crispy Homemade Samosas
Equipment
- Large mixing bowl
- Rolling Pin
- Sharp knife
- Large skillet
- Deep heavy-bottomed pot for frying
- Candy thermometer
- Slotted Spoon
- Paper Towels
- Clean kitchen towels
Ingredients
- 2 cups all-purpose flour or whole wheat pastry flour for healthier option
- 1/2 teaspoon salt
- 4 tablespoons vegetable oil or ghee ensure ghee is halal-certified if using
- 1/2 cup warm water approximately, add gradually
- 4 medium potatoes boiled, peeled, and diced
- 1 cup green peas fresh or frozen
- 2 tablespoons vegetable oil
- 1 teaspoon cumin seeds
- 1 teaspoon coriander seeds crushed
- 1 inch fresh ginger minced
- 2 cloves garlic minced
- 1 teaspoon turmeric powder
- 1 teaspoon garam masala freshly ground preferred
- 1/2 teaspoon red chili powder adjust to taste
- 1 teaspoon salt or to taste
- 2 tablespoons fresh cilantro chopped
- 4 cups vegetable oil for deep frying
Instructions
- In a large mixing bowl, combine 2 cups flour and 1/2 teaspoon salt. Make a well in the center and add 4 tablespoons oil. Rub the oil into the flour using your fingertips until the mixture resembles coarse breadcrumbs.
- Gradually add warm water, 1-2 tablespoons at a time, mixing with your hands until a firm dough forms. The dough should be slightly stiffer than bread dough and not sticky. Knead for 3-4 minutes until smooth.
- Cover the dough with a damp kitchen towel and let it rest for 30 minutes. This resting time is crucial for developing gluten and achieving the perfect flaky texture.
- Heat 2 tablespoons oil in a large skillet over medium heat. Add cumin seeds and crushed coriander seeds, frying until fragrant, about 30 seconds.
- Add minced ginger and garlic, cooking for 1 minute until aromatic. Add turmeric, garam masala, and red chili powder, stirring constantly for 30 seconds to prevent burning.
- Add diced potatoes and peas to the pan. Season with salt and mix well to coat with spices. Cook for 5-7 minutes, stirring occasionally, until the mixture is well combined and slightly dry.
- Remove from heat and stir in fresh cilantro. Let the filling cool completely before assembling samosas. Taste and adjust seasoning as needed.
- Divide the rested dough into 10 equal portions and roll each into a ball. On a lightly floured surface, roll each ball into a 6-inch (15cm) circle, about 1/8-inch thick.
- Cut each circle in half to create semicircles. Take one semicircle and form a cone by bringing the straight edges together, overlapping them slightly. Seal the seam with a few drops of water and press firmly.
- Hold the cone in your palm and fill it with 1-2 tablespoons of cooled filling, leaving about 1/2 inch space at the top. Do not overfill as this will make sealing difficult.
- To seal, brush the open edges with water, then press and fold the edges together, creating a triangular shape. Press firmly along all seams to ensure they are completely sealed. Repeat with remaining dough and filling.
- Heat 4 cups vegetable oil in a deep, heavy-bottomed pot to 325°F (165°C). Use a candy thermometer to monitor temperature accurately - this is crucial for achieving the perfect golden, crispy exterior.
- Carefully lower 4-5 samosas into the hot oil using a slotted spoon. Do not overcrowd the pot as this will lower the oil temperature and result in soggy samosas.
- Fry for 8-10 minutes, turning occasionally, until golden brown and crispy all over. The samosas should float to the surface and have a deep golden color when done.
- Remove with a slotted spoon and drain on paper towels. Serve immediately while hot and crispy, accompanied by mint chutney or tamarind sauce.
Notes
The dough should feel firm and slightly stiff - if too soft, the samosas will absorb too much oil. Add flour if sticky, water if too dry. FOLDING TECHNIQUE:
Ensure all seams are tightly sealed with water to prevent opening during frying. Press edges firmly and avoid overfilling. FRYING TEMPERATURE:
Maintain oil at 325°F (165°C) throughout frying. Too hot will brown the outside before cooking the dough completely; too cool will make them greasy. STORAGE:
Uncooked samosas can be frozen for up to 3 months. Fry directly from frozen, adding 2-3 extra minutes. Cooked samosas stay crispy for 2-3 hours at room temperature. TROUBLESHOOTING:
If samosas open during frying, the dough was too wet or seams weren't properly sealed. If they're tough, the dough was overworked or oil temperature was too low.
Nutrition Highlights (Per Serving – Approximate)
Understanding your food’s composition is key to balanced eating. Here is an approximate nutritional breakdown calculated for a standard serving based on wholesome preparation guidelines:
Culinary Selection Notes
- Adjusting sweetener densities or using refined-sugar alternatives will directly optimize the overall glycemic load without breaking structural balance.
- Focusing on high-quality whole fats maximizes trace micronutrient retention across low-temperature or baking environments.
Frequently Asked Questions (FAQs)
Can I make samosa dough ahead of time?
Yes, samosa dough can be prepared up to 24 hours in advance when stored properly in the refrigerator. Wrap the dough tightly in plastic wrap to prevent drying out, and allow it to come to room temperature for 15-20 minutes before rolling. This make-ahead approach actually improves the dough’s workability by allowing the gluten to relax fully.
Why do my samosas open up during frying?
Samosas typically open during frying due to inadequate sealing or overfilling. Ensure the dough edges are lightly moistened with water before pressing together firmly, and avoid stuffing too much filling into each pastry. Additionally, oil temperature that’s too high can cause rapid expansion and bursting before the seams have time to set properly.
What’s the best oil temperature for frying samosas?
The optimal frying temperature for samosas is 350°F (175°C), which allows the exterior to crisp gradually while the filling heats through evenly. Oil that’s too hot browns the outside before cooking the interior, while cooler oil results in greasy, soggy pastries. Use a cooking thermometer for accuracy, or test with a small piece of dough that should sizzle immediately upon contact.
How can I tell when samosas are fully cooked?
Properly cooked samosas display a uniform golden-brown color and sound hollow when tapped gently with a spoon. They should feel light and crispy rather than heavy or soft, and no raw dough color should be visible anywhere on the surface. The filling should be steaming hot throughout when you break one open for testing.
Can I bake samosas instead of frying them?
Absolutely! Baked samosas provide a healthier alternative with excellent results when prepared correctly. Brush the assembled pastries with oil and bake at 400°F (200°C) for 20-25 minutes, turning once halfway through cooking. While the texture differs slightly from fried versions, they still achieve satisfying crispiness with significantly less oil.
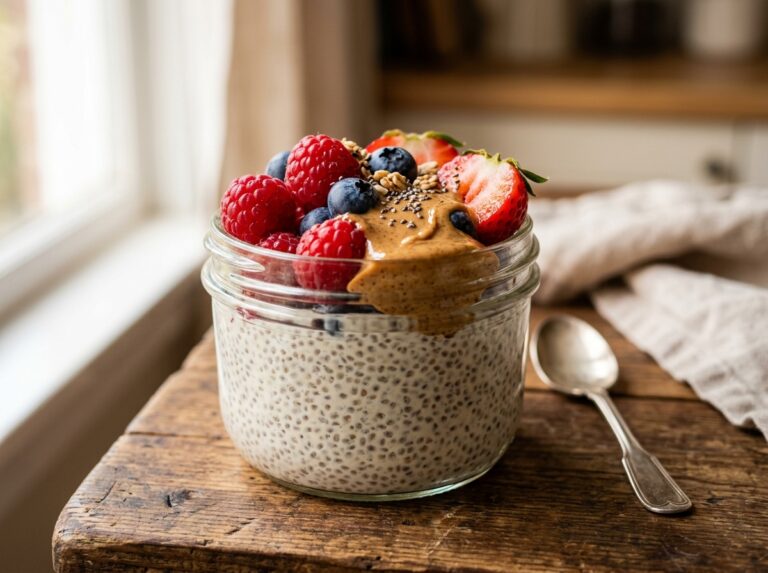
For more delicious Middle Eastern and South Asian inspired recipes, try our Tunisian Brik Recipe or explore our Bahraini Kebab Recipe for more authentic flavors. If you’re looking for healthy meal prep options, don’t miss our Chia Pudding Secrets guide for nutritious breakfast ideas.