Oreo Milkshake: Easy Homemade Thick and Creamy Treat
Learn how to make a thick, creamy oreo milkshake in minutes with this easy, foolproof recipe. Perfect for family treats. Get the recipe today.
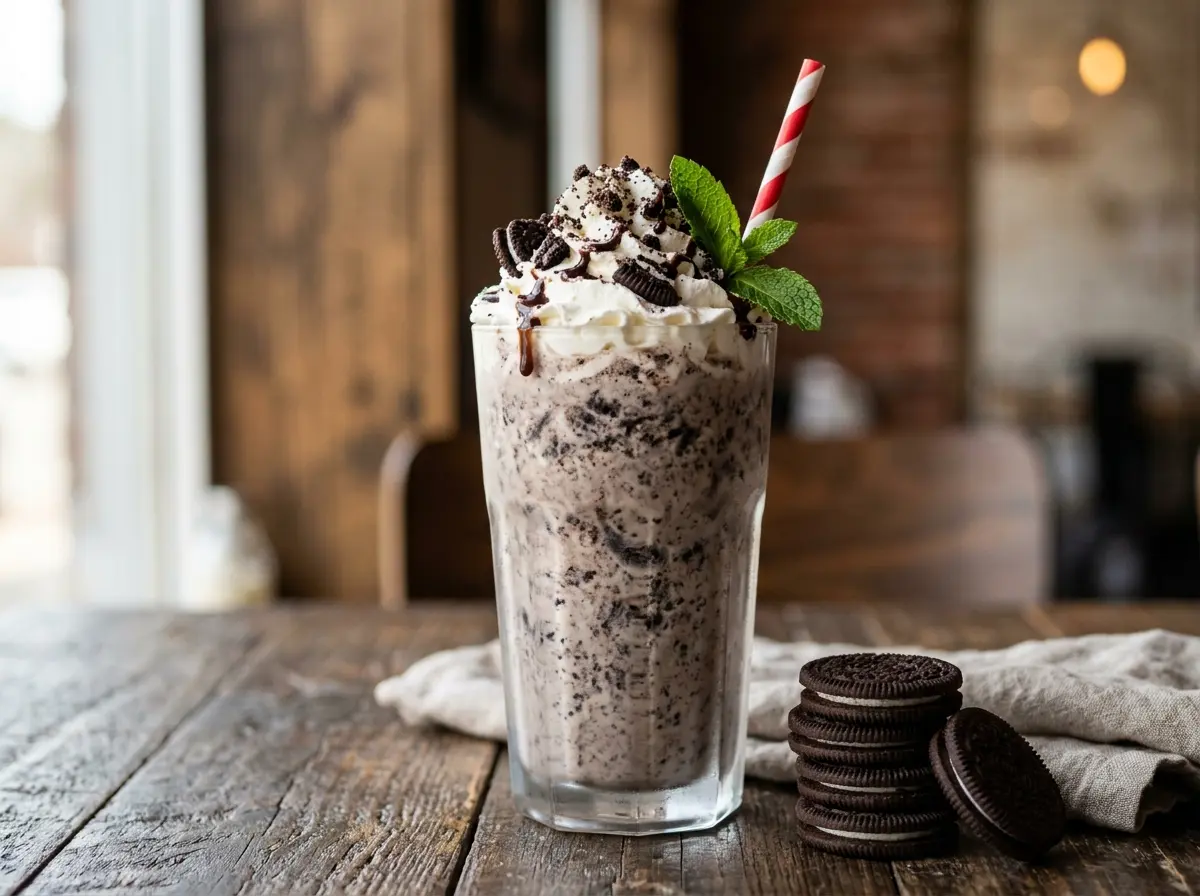
The perfect oreo milkshake combines the beloved chocolate sandwich cookie with rich, creamy ice cream to create an indulgent treat that satisfies both kids and adults. This homemade version delivers restaurant-quality thickness and flavor using simple ingredients you likely already have in your kitchen. The beauty lies in achieving that ideal balance between cookie crunch and smooth creaminess.
Every sip delivers the nostalgic taste of childhood while offering the satisfaction of a perfectly crafted dessert. The contrasting textures of crushed cookie pieces against the velvety milkshake base create a delightful sensory experience. This recipe transforms ordinary ingredients into an extraordinary treat that rivals any ice cream shop creation.
Introduction
Why Oreo Milkshake is a Favorite Treat
The oreo milkshake recipe has earned its place as a timeless dessert favorite due to its perfect marriage of familiar flavors and textures. The iconic chocolate wafer cookies provide that distinctive cocoa taste that pairs beautifully with vanilla ice cream’s richness. This combination creates a flavor profile that appeals to multiple generations simultaneously.
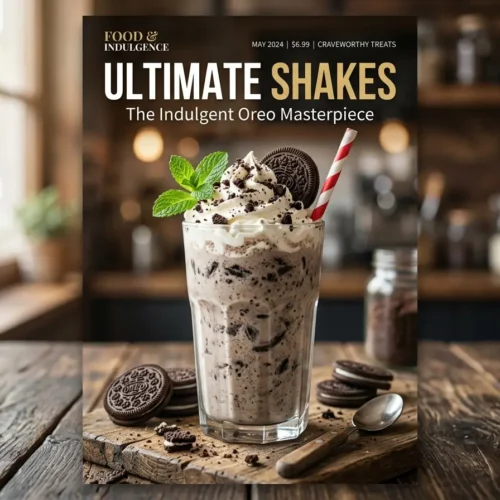
Beyond taste, the visual appeal of a thick oreo milkshake cannot be understated. The speckled appearance from crushed cookies creates an Instagram-worthy presentation that makes every glass feel special. The treat offers comfort food satisfaction while maintaining an element of fun and playfulness that makes it perfect for family gatherings or solo indulgence.
Brief Overview of the Recipe’s Ease and Texture
Creating a creamy oreo milkshake requires minimal effort but delivers maximum impact. The process involves simple blending techniques that anyone can master, regardless of kitchen experience level. The key lies in understanding the proper ratios and blending sequence to achieve that coveted thick consistency.
Temperature control and ingredient quality significantly influence the final texture. Using properly chilled ingredients ensures the milkshake maintains its thickness without becoming watery. The texture should coat a spoon while remaining smooth enough to drink through a straw, striking that perfect balance between beverage and dessert.
Ingredients
Core Ingredients with Measurements
The foundation of any exceptional homemade oreo milkshake rests on quality ingredients in proper proportions. Premium vanilla ice cream serves as the creamy base, while fresh Oreo cookies provide the signature flavor and texture contrast. Whole milk adds the necessary liquid content to achieve the perfect consistency.
Each ingredient plays a crucial role in the final outcome. The ice cream’s fat content directly impacts richness, while the milk’s temperature affects blending ease. Using room temperature cookies makes them easier to break down during blending, ensuring even distribution throughout the mixture.
Optional Ingredient Substitutions and Add-ons
For those with dietary restrictions, numerous substitutions can maintain the easy oreo milkshake experience. Dairy-free ice cream alternatives work beautifully, with coconut-based varieties providing exceptional creaminess. Almond milk or oat milk can replace regular milk while preserving the desired consistency.
Natural sweeteners like pure maple syrup or agave nectar can enhance sweetness without relying on refined sugar. Coconut cream adds richness for those avoiding dairy, while frozen banana provides natural creaminess and subtle sweetness. These modifications ensure everyone can enjoy this beloved treat regardless of dietary preferences.
Additional flavor enhancers include pure vanilla bean paste for deeper vanilla notes, or a pinch of sea salt to amplify the overall taste profile. Coconut flakes, chopped nuts, or fresh berries can introduce new texture elements while maintaining the core flavor integrity.
Equipment Needed
Recommended Kitchen Tools and Blender Tips
A high-powered blender stands as the most critical tool for creating the perfect thick oreo milkshake. The blender’s strength determines how smoothly ingredients combine and how well cookies break down into appealing chunks. Look for models with multiple speed settings to control texture consistency.
Additional helpful tools include measuring cups for accurate ingredient ratios, an ice cream scoop for easy portioning, and chilled glasses for serving. A rubber spatula helps scrape down blender sides during mixing, ensuring even incorporation of all ingredients.
For optimal blender performance, start with pulse mode to break down cookies initially, then gradually increase speed. This technique prevents overwhelming the motor while achieving the desired texture. Clean, dry equipment ensures the best blending results without unwanted water dilution.
Step-by-Step Preparation
Preparing the Milkshake Base
Proper preparation begins with ensuring all ingredients reach the correct temperature. Ice cream should be slightly softened but not melted, making it easier to blend while maintaining thickness. Milk should be cold but not frozen, as extremely cold temperatures can shock the blender motor.
Breaking Oreo cookies into smaller pieces before blending creates more consistent texture throughout the oreo milkshake variations. This pre-breaking step prevents large chunks from remaining unblended while ensuring even flavor distribution. Remove any packaging carefully to avoid unwanted debris.
Blending Instructions for Thick and Creamy Texture
The blending sequence directly impacts final texture quality. Begin by adding liquid ingredients first, followed by ice cream, then cookie pieces. This layering helps create proper vortex action for thorough mixing without overworking the ingredients.
Pulse initially to break down cookies and incorporate ice cream, then blend on medium speed for 30-45 seconds. Avoid over-blending, which can thin the mixture and reduce that coveted thick consistency. Check texture frequently and adjust blending time accordingly.
For extra thickness, add ice cream gradually while blending. For thinner consistency, incorporate milk slowly until reaching desired texture. The ideal homemade oreo milkshake should hold its shape when poured but flow smoothly through a wide straw.
Troubleshooting Common Issues
Thin consistency often results from over-blending or using too much liquid. Combat this by adding more ice cream gradually while pulsing gently. Conversely, overly thick mixtures benefit from small milk additions, added one tablespoon at a time.
Uneven cookie distribution occurs when cookies are added too late in the process. Always add cookies early and pulse initially to ensure proper breakdown. If large chunks remain, pause blending, break them manually, then continue mixing.
Temperature issues can cause separation or poor texture. If ingredients are too warm, briefly chill the mixture before final blending. If too cold, let sit for a few minutes at room temperature before continuing the mixing process.
Variations and Customizations
Oreo Milkshake Without Ice Cream
Creating an oreo milkshake without ice cream opens possibilities for those seeking lighter alternatives or managing dietary restrictions. Frozen bananas provide natural creaminess and sweetness while maintaining thick texture. Blend frozen bananas with milk and cookies for a surprisingly satisfying result.
Greek yogurt adds protein and tanginess while contributing to creamy consistency. Combine with a touch of honey and vanilla for enhanced flavor complexity. This variation offers nutritional benefits while preserving the beloved cookie taste that makes this treat special.
Silken tofu creates unexpected creaminess for dairy-free versions. When blended with plant-based milk and natural sweeteners, it produces remarkably smooth texture. Add vanilla extract and a pinch of salt to enhance overall flavor profile and mask any potential tofu taste.
Toppings and Garnish Ideas
Creative oreo milkshake toppings transform simple drinks into Instagram-worthy desserts. Whipped cream provides classic elegance, while crushed cookie pieces add textural interest and visual appeal. Fresh berries introduce color contrast and natural sweetness that complements the chocolate flavors.
Drizzle options include pure chocolate syrup, caramel sauce, or even peanut butter for those without allergies. These additions create beautiful presentation while adding complementary flavors. Sprinkle options range from coconut flakes to chopped nuts, offering endless customization possibilities.
For special occasions, consider cookie rim garnishes or chocolate shavings. Mini cookies perched on glass rims create playful presentation, while chocolate curls add sophisticated elegance. These details elevate the humble milkshake into celebration-worthy treats.
Seasonal and Flavor Variations
Seasonal adaptations keep the core oreo milkshake concept fresh throughout the year. Summer versions might incorporate fresh mint leaves for cooling refreshment, while winter variations could include warming spices like cinnamon or cardamom for cozy comfort.
Flavor extensions include peanut butter for extra richness, fresh strawberries for fruity sweetness, or coffee for adult sophistication. Each addition should complement rather than overpower the signature cookie flavor that defines this classic treat.
Holiday themes offer fun customization opportunities. Orange food coloring creates festive Halloween versions, while red and green sprinkles add Christmas cheer. These modifications maintain flavor integrity while adding seasonal excitement for family celebrations.
Storage and Make-Ahead Tips
How to Store Leftovers Properly
Proper oreo milkshake storage maintains quality and safety for future enjoyment. Transfer leftover milkshake to airtight containers, leaving minimal air space to prevent crystallization. Refrigerate immediately and consume within 24 hours for optimal taste and texture.
Before serving stored milkshake, allow slight thawing if frozen solid, then blend briefly to restore smooth consistency. Add small amounts of milk if needed to achieve desired texture. Never leave dairy-based milkshakes at room temperature for extended periods.
Make-Ahead Preparation Instructions
While fresh preparation yields best results, certain oreo milkshake make-ahead techniques can save time during busy periods. Pre-crushing cookies and storing them in airtight containers maintains freshness while reducing preparation time. Measure dry ingredients ahead and store separately from dairy components.
For special events, consider preparing base mixture without final blending, storing components separately until serving time. This approach maintains ingredient integrity while allowing quick assembly when needed. Always blend just before serving for optimal texture and flavor.
Freezer-friendly modifications involve creating milkshake pops using the same ingredient ratios. Pour mixture into molds and freeze for convenient individual servings. These treats offer the same flavors in a different format, perfect for outdoor gatherings or summer entertaining.
Nutritional Information
Nutrition Highlights (Per Serving – Approximate)
Understanding your food’s composition is key to balanced eating. Here is an approximate nutritional breakdown calculated for a standard serving based on wholesome preparation guidelines:
Culinary Selection Notes
- Adjusting sweetener densities or using refined-sugar alternatives will directly optimize the overall glycemic load without breaking structural balance.
- Focusing on high-quality whole fats maximizes trace micronutrient retention across low-temperature or baking environments.
Oreo Milkshake
Equipment
- High-Speed Blender
- Measuring cups
- Ice cream scoop
- Tall glasses for serving
- Straws
Ingredients
- 3 cups Vanilla ice cream slightly softened, or use dairy-free vanilla ice cream
- 1/2 cup Whole milk or substitute with almond milk, oat milk, or coconut milk
- 12 Chocolate sandwich cookies regular Oreos or sugar-free chocolate cookies
- 2 tablespoons Natural sweetener honey, maple syrup, or stevia to taste
- 1/2 cup Fresh strawberries hulled and sliced, for added nutrition
- 1 tablespoon Pure vanilla extract for enhanced flavor
- 2 tablespoons Whipped cream for topping
Instructions
- Remove ice cream from freezer and let it soften slightly at room temperature for 2-3 minutes to make blending easier.
- Break 10 chocolate sandwich cookies into quarters, reserving 2 whole cookies for garnish. This ensures better distribution and prevents large chunks from jamming the blender.
- Add softened ice cream and milk to the high-speed blender. Start with less milk for a thicker consistency - you can always add more.
- Add broken cookie pieces and any optional ingredients like vanilla extract or natural sweetener. If using fresh strawberries, add them now for a fruity twist.
- Blend on medium speed for 15-20 seconds, then increase to high speed for another 10-15 seconds until smooth and creamy. Avoid over-blending to prevent melting.
- Check consistency and adjust by adding more milk for thinner texture or more ice cream for thickness. Pulse briefly to incorporate any adjustments.
- Pour the milkshake into chilled tall glasses, leaving room for toppings. The mixture should coat the back of a spoon when properly thick.
- Top with whipped cream if desired and garnish with reserved whole cookies or cookie crumbs. Serve immediately with wide straws.
Notes
For ultra-thick milkshakes, use less milk and more ice cream. For thinner consistency, gradually add milk 1 tablespoon at a time. The ideal milkshake should be thick enough to coat a spoon but still drinkable through a straw. CUSTOMIZATION OPTIONS:
Make it dairy-free by using coconut or oat milk ice cream and plant-based milk. For sugar-free versions, use sugar-free cookies and stevia. Add fresh fruit like strawberries or bananas for natural sweetness and nutrition. TROUBLESHOOTING:
If cookies aren't blending well, break them into smaller pieces before adding. If mixture is too thick, add milk gradually. If too thin, add more ice cream or freeze for 10 minutes before serving. STORAGE:
Best served immediately for optimal texture. Can be stored in freezer for up to 2 hours - stir well before serving as separation may occur. Re-blend briefly if needed to restore smooth consistency.
Calories, Macros, and Ingredient Health Benefits
The oreo milkshake nutrition facts reveal a treat rich in calcium and protein from dairy ingredients. Ice cream provides essential fats that help with nutrient absorption, while milk contributes valuable vitamins and minerals. These nutrients support bone health and provide sustained energy.
Understanding portion sizes helps maintain balanced nutrition while enjoying this indulgent treat. A standard serving provides significant calories, making it ideal as an occasional dessert rather than regular snack. The combination of carbohydrates and fats offers quick energy followed by sustained satisfaction.
Dietary Modification Suggestions
Reducing sugar content becomes possible through various oreo milkshake ingredient substitutions. Natural sweeteners like stevia or monk fruit provide sweetness without added calories. Using sugar-free cookies and reduced-sugar ice cream significantly lowers overall sugar content.
Protein enhancement options include adding protein powder or Greek yogurt to boost nutritional value. These additions make the treat more suitable as post-workout nutrition while maintaining beloved flavors. Choose vanilla protein powder to complement existing taste profiles.
For those monitoring fat intake, using light ice cream and skim milk reduces fat content without completely sacrificing texture. These modifications create lighter versions that still deliver satisfying taste experiences while supporting various dietary goals.
Serving Suggestions and Enjoyment
Kid-Friendly Presentation Tips
Creating memorable presentations transforms simple milkshakes into special experiences for children. Colorful straws, fun glasses, and whimsical toppings make each serving feel like a celebration. Consider using mason jars or clear glasses to showcase the beautiful speckled appearance.
Interactive elements like letting kids choose their own toppings or garnishes increases engagement and enjoyment. Set up a small topping station with various cookie pieces, sprinkles, and whipped cream options. This approach makes the treat feel more special while encouraging creativity.
Size considerations matter for younger children. Smaller portions in appropriate glasses prevent waste while ensuring kids can finish their treats. Consider offering half-size servings as after-meal desserts or special snacks during family movie nights.
Family Bonding Activities Around the Recipe
Preparing milkshakes together creates opportunities for quality family time and kitchen skill development. Children can help measure ingredients, operate blenders with supervision, and learn about ratios and consistency. These activities build confidence while creating lasting memories.
Related recipes like Oreo ice cream cake or semifreddo can extend the cookie theme into full dessert menus. Planning themed dessert nights around favorite cookies creates anticipation and family traditions that children will remember for years.
Educational opportunities arise naturally during preparation. Discuss ingredient origins, nutritional content, and cooking science concepts like emulsification and temperature effects. These conversations make cooking time both fun and educational, fostering lifelong interests in culinary arts.
Conclusion
Recap of Key Points
Mastering the art of homemade oreo milkshakes requires attention to ingredient quality, proper technique, and temperature control. The key lies in achieving perfect balance between thickness and drinkability while maintaining consistent cookie distribution throughout. These fundamentals ensure success every time you prepare this beloved treat.
Storage considerations and make-ahead options provide flexibility for busy schedules while maintaining quality standards. Understanding nutritional content and available substitutions allows customization for various dietary needs. These adaptations ensure everyone can enjoy this classic dessert regardless of restrictions or preferences.
Encouragement to Try and Customize Your Oreo Milkshake
The beauty of this recipe lies in its adaptability and potential for creative expression. Each family can develop their own signature version through preferred toppings, consistency adjustments, and flavor additions. Experimentation leads to personalized treats that become treasured family favorites.
Start with the basic recipe to understand fundamental techniques, then gradually explore variations that appeal to your taste preferences. Document successful modifications to recreate favorite versions in the future. For more frozen dessert inspiration, explore our ultimate ice cream sundae guide for additional creative serving ideas.
Remember that perfect results come through practice and patience. Don’t hesitate to adjust ingredients and techniques based on your equipment and preferences. The journey of perfecting your homemade oreo milkshake becomes part of the enjoyment, creating memories that last far beyond the final sip.