Pumpkin Pie Recipe: Easy, Perfect Homemade Fall Dessert
Discover a foolproof pumpkin pie recipe with smooth filling and flaky crust. Perfect for beginners—start baking this classic fall dessert today.
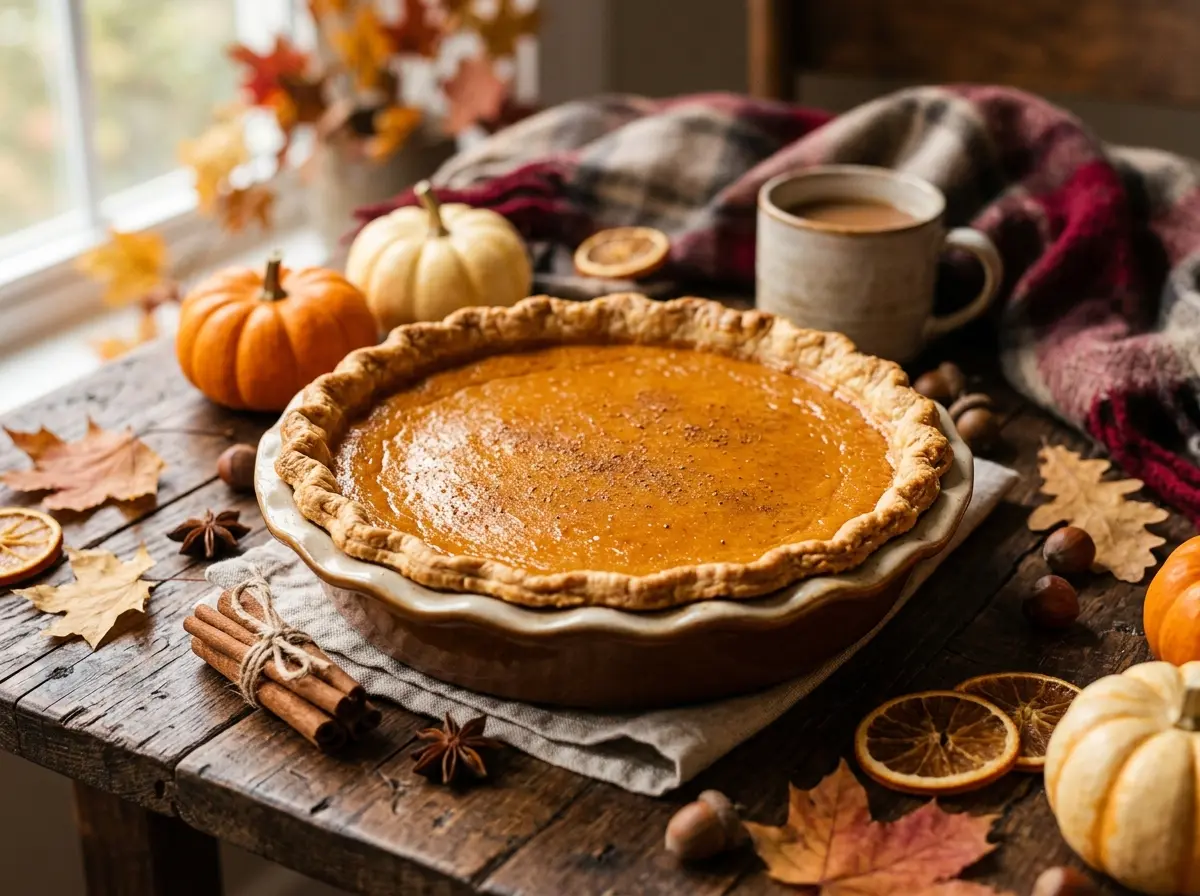
This pumpkin pie recipe delivers the perfect balance of creamy texture, warm spices, and buttery crust that defines an authentic fall dessert. Whether you’re preparing for Thanksgiving or simply craving seasonal comfort, this foolproof method ensures consistently delicious results. Every bite offers that signature silky filling with just the right amount of sweetness and aromatic spice blend.
The secret lies in understanding the science behind proper custard formation and temperature control. This approach eliminates common pitfalls like cracking, watery filling, or soggy crusts. You’ll master professional-grade techniques while working with accessible ingredients from your pantry.
Introduction
Creating the perfect homemade pumpkin pie requires more than following basic measurements. Understanding ingredient interactions, proper mixing techniques, and optimal baking conditions transforms average results into bakery-quality desserts.
Why This Pumpkin Pie Recipe Stands Out
This easy pumpkin pie recipe eliminates guesswork through precise temperature guidelines and visual doneness cues. The filling achieves ideal consistency without excessive eggs that can cause rubbery texture. Strategic spice ratios enhance natural pumpkin flavor rather than overpowering it.
Professional bakers rely on custard science principles that this method incorporates seamlessly. Temperature-controlled mixing prevents curdling while proper pre-baking ensures structural integrity. These techniques work whether you’re making your first pie or your hundredth.
Overview of Ingredients and Tools Needed
Essential equipment includes a food processor for smooth filling consistency, accurate measuring tools, and a reliable oven thermometer. Quality ingredients make noticeable differences in final flavor and texture. Fresh spices, pure vanilla, and high-quality dairy products elevate every component.
Standard 9-inch pie pans work best for even heat distribution and proper cooking times. Glass or ceramic dishes provide superior browning compared to metal alternatives. Having all tools prepared beforehand streamlines the entire baking process.
Ingredients Breakdown
Selecting premium ingredients directly impacts your best pumpkin pie recipe outcome. Each component serves specific structural and flavor purposes that contribute to the final masterpiece.
Choosing the Right Pumpkin Puree
Canned pumpkin puree offers consistent moisture content and smooth texture ideal for custard-based desserts. Pure pumpkin varieties like Libby’s contain no added ingredients that might affect binding properties. Fresh roasted pumpkin requires extra moisture removal to prevent watery filling.
Sugar pie pumpkins provide the best flavor when preparing puree from scratch. Roast halved pumpkins cut-side down at 400°F until fork-tender, then scrape and strain through fine mesh. This method concentrates flavors while removing excess liquid.
Butternut squash makes an excellent pumpkin substitute with naturally sweeter notes. The preparation process remains identical whether using traditional pumpkin or alternative winter squashes. Always allow homemade puree to cool completely before incorporating into custard mixtures.
Exploring Natural Sweetener Alternatives
Maple syrup creates complex caramel undertones while reducing refined sugar content significantly. Use grade A dark robust maple syrup for pronounced flavor that complements pumpkin’s earthiness. Reduce liquid ingredients by 2 tablespoons when substituting maple syrup for granulated sugar.
Coconut sugar provides subtle molasses notes with lower glycemic impact than white sugar. This granulated sweetener measures cup-for-cup in most applications without texture modifications. The slight caramel flavor enhances spice blend complexity naturally.
Date paste offers whole food sweetening with added fiber and minerals. Blend pitted Medjool dates with minimal water until smooth, then incorporate gradually while monitoring consistency. Start with 3/4 the amount of date paste compared to regular sugar measurements.
Gluten-Free and Dairy-Free Options
Almond flour-based crusts provide nutty richness while maintaining structural integrity required for custard fillings. Combine almond flour, coconut flour, and binding agents like ground flaxseed for optimal texture. Pre-bake gluten-free crusts 5 minutes longer than traditional wheat versions.
Coconut cream creates luxurious dairy-free filling with natural sweetness and smooth consistency. Refrigerate full-fat coconut milk overnight, then scoop the solid cream portion for recipes. This technique concentrates richness without artificial thickeners or stabilizers.
Cashew cream offers neutral flavor that allows pumpkin and spices to shine prominently. Soak raw cashews 4 hours, then blend with minimal liquid until completely smooth. Strain through fine mesh to eliminate any remaining grittiness that might affect final texture.
Step-by-Step Pumpkin Pie Preparation
Methodical preparation ensures each component develops properly for optimal flavor and texture integration. Following precise sequences prevents common mistakes while building confidence through clear visual markers.
Preparing the Perfect Pie Crust (Including Blind Baking Tips)
Cold butter creates steam pockets during baking that produce flaky, tender layers essential for quality pastry. Cut butter into small cubes and freeze 15 minutes before incorporating with flour mixture. Work quickly to prevent warming that leads to tough, dense results.
Ice water addition requires careful measurement to achieve proper dough consistency without overhydration. Add liquid gradually while mixing minimally to prevent gluten development. The dough should hold together when pressed but not feel sticky or wet.
Blind baking prevents soggy bottom crust by partially cooking the pastry before adding filling. Line dough with parchment paper and fill with pie weights or dried beans for even browning. Remove weights during the final 5 minutes to achieve golden color throughout.
For our perfect flaky crust secrets, temperature control remains absolutely critical. Preheat your oven to 425°F and maintain consistent heat throughout the blind baking process.
Mixing the Filling for Smooth Texture
Room temperature ingredients blend more easily and create smoother custard without lumps or air bubbles. Remove dairy products from refrigeration 30 minutes before mixing to ensure even incorporation. Cold ingredients can cause mixture separation and uneven cooking.
Whisk dry spices into pumpkin puree before adding wet ingredients to distribute flavors evenly throughout. This technique prevents spice clumping while ensuring consistent taste in every bite. Taste and adjust seasoning before proceeding to egg incorporation.
Add beaten eggs gradually while whisking constantly to prevent curdling from temperature shock. Pour eggs in thin stream rather than all at once for better emulsion formation. Strain final mixture through fine mesh to remove any remaining lumps or shell fragments.
Baking Tips: Temperature and Timing
High initial temperature sets the crust structure before reducing heat for gentle custard cooking. Start at 425°F for 15 minutes, then lower to 350°F for remaining bake time. This two-stage approach prevents overbrowning while ensuring proper doneness.
Custard cooking requires precise timing based on visual cues rather than strict time limits. The center should jiggle slightly when gently shaken, similar to barely set gelatin. Overbaked filling becomes grainy and develops cracks across the surface.
Cooling process continues cooking through residual heat, so remove pies when slightly underdone. Place on wire racks away from drafts that might cause rapid temperature changes. Complete cooling takes 2-3 hours before refrigeration becomes safe.
Troubleshooting and Tips for Success
Understanding common pumpkin pie challenges helps prevent disappointing results while building troubleshooting skills for future baking projects. Most issues stem from temperature, timing, or ingredient ratio problems that simple adjustments can resolve.
How to Avoid Cracking and Watery Filling
Cracking occurs when custard overcooks or cools too rapidly after baking completion. Reduce oven temperature by 25°F if persistent cracking develops across multiple attempts. Shield pie edges with foil strips during final baking stages to prevent excessive browning.
Gradual cooling prevents thermal shock that causes surface tension and splitting. Turn off oven and crack door slightly, allowing pie to cool slowly for 30 minutes before removing. Avoid cold drafts or rapid temperature changes during this critical period.
Watery filling results from excess moisture in pumpkin puree or insufficient binding agents. Drain canned pumpkin in fine mesh strainer for 30 minutes before using if consistency seems thin. Fresh puree requires longer draining or additional cooking to concentrate flavors properly.
Proper egg ratios create stable emulsion that holds liquid ingredients in suspension throughout baking. Too few eggs produce runny texture while excessive eggs cause rubbery consistency. Follow tested ratios and avoid substitutions that alter protein content significantly.
Tips for Preventing a Soggy Bottom Crust
Pre-baking eliminates moisture problems by partially cooking pastry before filling addition. Dock bottom crust with fork tines to prevent puffing during blind baking stage. Use pie weights to maintain shape while allowing even heat penetration.
Sealing techniques create moisture barriers between crust and filling for longer-lasting crispness. Brush pre-baked shell with beaten egg white, then return to oven for 2 minutes until set. This protein coating prevents liquid absorption during custard baking.
Glass pie plates conduct heat more effectively than metal pans for superior bottom browning. Dark-colored dishes absorb heat faster and may require temperature reduction to prevent burning. Monitor progress through clear glass to assess doneness without opening oven door.
Visual Cues for Pie Doneness
Properly baked classic pumpkin pie exhibits specific visual markers that indicate optimal custard setting. The center should maintain slight jiggle when gently shaken, similar to firm gelatin texture. Completely solid centers indicate overbaking and potential texture problems.
Edge browning provides secondary doneness indicators while preventing overcooking in thinner areas. Golden-brown crust edges should develop before center reaches final consistency. Cover edges with foil strips if browning occurs too rapidly during baking process.
Internal temperature measurement offers precise doneness assessment for consistent results across different oven variations. Insert instant-read thermometer 2 inches from edge rather than center for accurate readings. Target temperature ranges from 175-180°F for optimal custard texture.
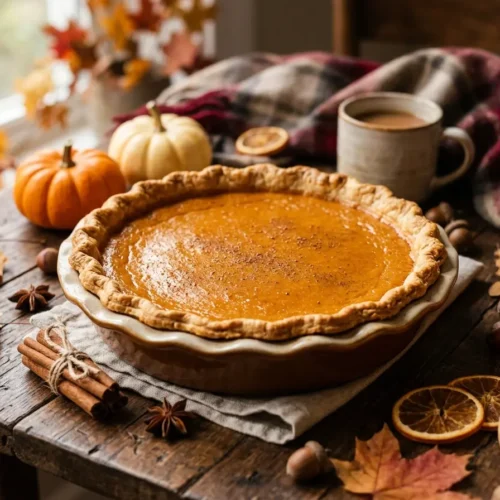
Perfect Homemade Pumpkin Pie
Equipment
- 9-inch pie dish
- Large mixing bowl
- Medium Mixing Bowl
- Wire whisk
- Measuring cups and spoons
- Kitchen scale (optional for metric)
- Pie weights or dried beans
- Parchment paper
- Fine-Mesh Sieve
- Rubber Spatula
Ingredients
- 1¼ cups All-purpose flour or 1½ cups almond flour for gluten-free (150g)
- ½ teaspoon Salt
- ⅓ cup Unsalted butter cold, cubed (75g)
- 3-4 tablespoons Ice water
- 1 can Pumpkin puree 15 oz (425g), not pumpkin pie filling
- 3 large Eggs room temperature
- ¾ cup Pure maple syrup or ⅔ cup coconut sugar (130g)
- 1 cup Heavy cream or full-fat coconut milk (240ml)
- 1 teaspoon Pure vanilla extract
- 1½ teaspoons Ground cinnamon
- ½ teaspoon Ground ginger
- ¼ teaspoon Ground nutmeg freshly grated preferred
- ¼ teaspoon Ground cloves
- ½ teaspoon Salt
Instructions
- In a medium bowl, whisk together flour and salt. Cut in cold butter using a pastry cutter or fork until mixture resembles coarse crumbs with some pea-sized pieces.
- Gradually add ice water, 1 tablespoon at a time, mixing gently until dough just comes together. Form into a disk, wrap in plastic, and refrigerate for 30 minutes.
- On a floured surface, roll dough into a 12-inch circle. Transfer to a 9-inch pie dish, trim edges to 1-inch overhang, and crimp decoratively. Refrigerate while preparing filling.
- Preheat oven to 425°F (220°C). Line chilled crust with parchment paper and fill with pie weights or dried beans.
- Bake for 15 minutes, then carefully remove weights and parchment. Continue baking 5-8 minutes until edges are lightly golden. Remove and reduce oven temperature to 350°F (175°C).
- In a large bowl, whisk pumpkin puree until smooth. Add eggs one at a time, whisking well after each addition.
- Whisk in maple syrup, heavy cream, and vanilla extract until completely smooth. In a small bowl, combine all spices and salt.
- Add spice mixture to pumpkin mixture and whisk until evenly distributed. Strain through fine-mesh sieve to ensure silky texture, pressing any lumps through with spatula.
- Pour filling into pre-baked crust, filling to about ¼-inch from the top edge. Gently tap dish to release air bubbles.
- Bake at 350°F (175°C) for 45-55 minutes until center is almost set but still slightly jiggly when gently shaken. A knife inserted 2 inches from edge should come out clean.
- Cool completely on wire rack for at least 2 hours before slicing. The filling will continue to set as it cools.
Notes
The pie is done when the edges are set and the center has just a slight jiggle when gently shaken. The surface should be evenly golden without cracks. STORAGE:
Cover and refrigerate for up to 4 days. Can be frozen for up to 2 months - thaw overnight in refrigerator before serving. SCALING:
For mini pies, reduce baking time to 25-30 minutes. For a deep-dish pie, increase filling by half and extend baking time by 10-15 minutes. TROUBLESHOOTING:
If crust edges brown too quickly, cover with aluminum foil strips. Cracks in filling indicate overbaking - reduce temperature next time. Soggy bottom crust means insufficient blind-baking.
Nutrition Highlights (Per Serving – Approximate)
Understanding your food’s composition is key to balanced eating. Here is an approximate nutritional breakdown calculated for a standard serving based on wholesome preparation guidelines:
Culinary Selection Notes
- Adjusting sweetener densities or using refined-sugar alternatives will directly optimize the overall glycemic load without breaking structural balance.
- Focusing on high-quality whole fats maximizes trace micronutrient retention across low-temperature or baking environments.
Variations and Special Recipe Versions
Creative adaptations expand serving options while maintaining the essential character of traditional pumpkin pie. These variations accommodate different dietary needs, portion preferences, and presentation styles for diverse entertaining situations.
Mini Pumpkin Pies and Pumpkin Pie Bars
Mini pumpkin pies offer portion control and elegant individual presentation perfect for parties or gatherings. Use standard muffin tins lined with pastry circles, reducing baking time by 10-15 minutes. Individual servings cook faster and provide consistent results across multiple portions.
Pumpkin pie bars simplify serving while maintaining beloved flavor profiles in convenient handheld format. Press shortbread-style crust into rectangular pan, then pour filling over base layer. Cut into squares after cooling for neat presentation without traditional pie slicing challenges.
Tartlet shells create sophisticated presentations suitable for formal occasions or dessert buffets. Use 4-inch tart pans for optimal filling-to-crust ratios that highlight custard texture. Professional appearance rivals bakery offerings while allowing creative garnish opportunities.
No-Bake Pumpkin Pie Options
Gelatin-based no-bake versions provide summer-friendly alternatives when oven use becomes impractical. Bloom unflavored gelatin in cold liquid, then dissolve in heated cream before combining with pumpkin mixture. Refrigerate 4 hours minimum for proper setting and slicing consistency.
Cream cheese stabilization creates rich, mousse-like texture without requiring heat activation or egg cooking. Whip softened cream cheese with pumpkin puree and spices before folding in stabilized whipped cream. This method produces lighter texture compared to traditional baked versions.
Graham cracker crusts complement no-bake fillings while eliminating pastry preparation requirements entirely. Crush crackers finely and bind with melted butter, pressing firmly into pie plates. Chill crust while preparing filling for optimal structural support during assembly.
Spice Blend Alternatives for Unique Flavors
Chai-inspired spice combinations introduce warming cardamom and black pepper notes alongside traditional cinnamon and nutmeg. Add ground cardamom, fresh ginger, and tiny pinch of black pepper for complex aromatic profile. These bold flavors pair beautifully with pumpkin’s natural sweetness.
Maple-bourbon flavoring (using halal vanilla bean paste instead of alcohol) creates sophisticated adult-oriented taste profiles. Pure vanilla bean paste provides complex vanilla notes while maple extract enhances autumnal character. This combination works particularly well with coconut sugar sweetening.
International spice variations reflect global dessert traditions adapted for pumpkin applications. Try Chinese five-spice for subtle licorice notes, or Middle Eastern baharat for warm complexity. Start with half the normal spice quantity when experimenting with unfamiliar blends.
Storage, Make-Ahead, and Freezing
Proper storage techniques maintain texture and flavor quality while extending serving flexibility for busy schedules. Understanding optimal preservation methods prevents waste while ensuring food safety throughout extended storage periods.
How to Store Pumpkin Pie Properly
Refrigerated storage maintains optimal texture and prevents bacterial growth in dairy-based custard fillings. Cover loosely with plastic wrap or store in airtight containers to prevent absorption of refrigerator odors. Properly stored pies maintain quality for 3-4 days maximum.
Room temperature storage exceeds food safety guidelines for custard-based desserts containing eggs and dairy products. Custard fillings require consistent refrigeration after initial cooling period completes. Never leave finished pies at room temperature longer than 2 hours total.
Covering techniques prevent surface moisture loss while avoiding condensation that might affect crust crispness. Tent loosely with foil or use pie containers with adequate headroom above surface. Direct plastic contact can mar smooth custard appearance through moisture transfer.
Make-Ahead Instructions for Busy Bakers
Pumpkin pie recipe preparation benefits significantly from strategic advance planning that distributes workload across multiple days. Pre-bake crusts up to 2 days ahead, storing covered at room temperature until filling preparation. This approach reduces final assembly stress while ensuring optimal results.
Filling mixture can be prepared 24 hours in advance and refrigerated until baking time arrives. Whisk briefly before pouring into prepared crusts to redistribute any separated ingredients. Cold filling may require 5-10 additional baking minutes for proper doneness.
Complete pies freeze successfully for up to 2 months when properly wrapped and protected from freezer burn. Wrap cooled pies tightly in plastic wrap, then aluminum foil for double protection. Label clearly with contents and date for inventory management.
Freezing and Reheating Guidelines
Freeze whole pies after complete cooling but before refrigeration to maintain optimal texture integrity. Fast freezing preserves custard structure better than gradual temperature reduction. Use freezer-safe containers or heavy-duty wrapping materials designed for extended storage.
Thawing requires gradual temperature transition to prevent texture degradation or moisture separation issues. Move frozen pies to refrigerator 24 hours before serving to allow gentle, even warming. Avoid microwave thawing that can create hot spots and rubbery texture.
Reheating individual slices works best at low oven temperatures rather than microwave methods that affect custard consistency. Warm slices at 300°F for 10-15 minutes until just heated through. Cover edges with foil to prevent overbrowning during reheating process.
Frequently Asked Questions
Common questions about homemade pumpkin pie reflect shared challenges and curiosity about optimization techniques. These answers address frequent concerns while providing practical solutions for improved results.
Common Pumpkin Pie Recipe Questions Answered
Can I substitute fresh pumpkin for canned pumpkin in recipes? Fresh pumpkin requires moisture removal through roasting and straining to achieve proper consistency for custard formation. Use sugar pie pumpkins for best flavor, removing excess liquid through fine mesh straining after cooking.
Why did my pumpkin pie crack during baking? Cracking typically results from overbaking or rapid cooling that creates surface tension. Reduce oven temperature by 25°F and allow gradual cooling with oven door slightly open to prevent thermal shock.
How can I tell when my pumpkin pie is properly baked? The center should jiggle slightly when gently shaken, similar to barely set gelatin texture. Insert knife 2 inches from edge – it should come out clean while center remains slightly soft.
Can I make gluten-free pumpkin pie that tastes as good as traditional versions? Almond flour-based crusts provide excellent texture and flavor while accommodating gluten restrictions. Pre-bake gluten-free crusts slightly longer and seal with egg white wash for optimal moisture barrier properties.
What’s the best way to prevent soggy pie crust? Blind baking partially cooks the crust before filling addition, creating moisture barrier that prevents sogginess. Use pie weights and dock bottom with fork to maintain shape during pre-baking process.
How long does homemade pumpkin pie stay fresh? Properly refrigerated pumpkin pie maintains quality for 3-4 days maximum due to dairy and egg content requiring consistent cold storage. Cover loosely to prevent odor absorption while maintaining crust texture.
Conclusion
Mastering this pumpkin pie recipe opens doors to confident holiday baking while providing foundation skills applicable to numerous custard-based desserts. The techniques covered here translate directly to other seasonal favorites and expand your overall baking repertoire significantly.
Encouragement to Try This Foolproof Pumpkin Pie Recipe Today
Every element of this easy pumpkin pie recipe has been designed to eliminate common frustrations while building practical skills through clear, achievable steps. From crust preparation through final cooling, each phase contributes to professional-quality results that rival commercial bakery offerings.
The troubleshooting guidance and variation options provide flexibility for dietary restrictions, portion preferences, and flavor experimentation without compromising structural integrity. Whether preparing for special occasions or satisfying seasonal cravings, this method delivers consistent success through scientific understanding rather than guesswork.
Start with quality ingredients, follow temperature guidelines precisely, and trust the visual cues provided throughout the process. Your confidence will grow with each successful pie, leading to creative variations and proud sharing with family and friends who appreciate homemade excellence.
Similar seasonal desserts like our apple cinnamon cake and apple crumble recipe use many of the same fundamental techniques you’ve learned here.