Maple Pecan Pie Recipe: Delicious Easy Homemade Delight
Learn how to make the perfect maple pecan pie with our easy, foolproof recipe that delivers a rich, nutty flavor and ideal texture. Get the recipe today.
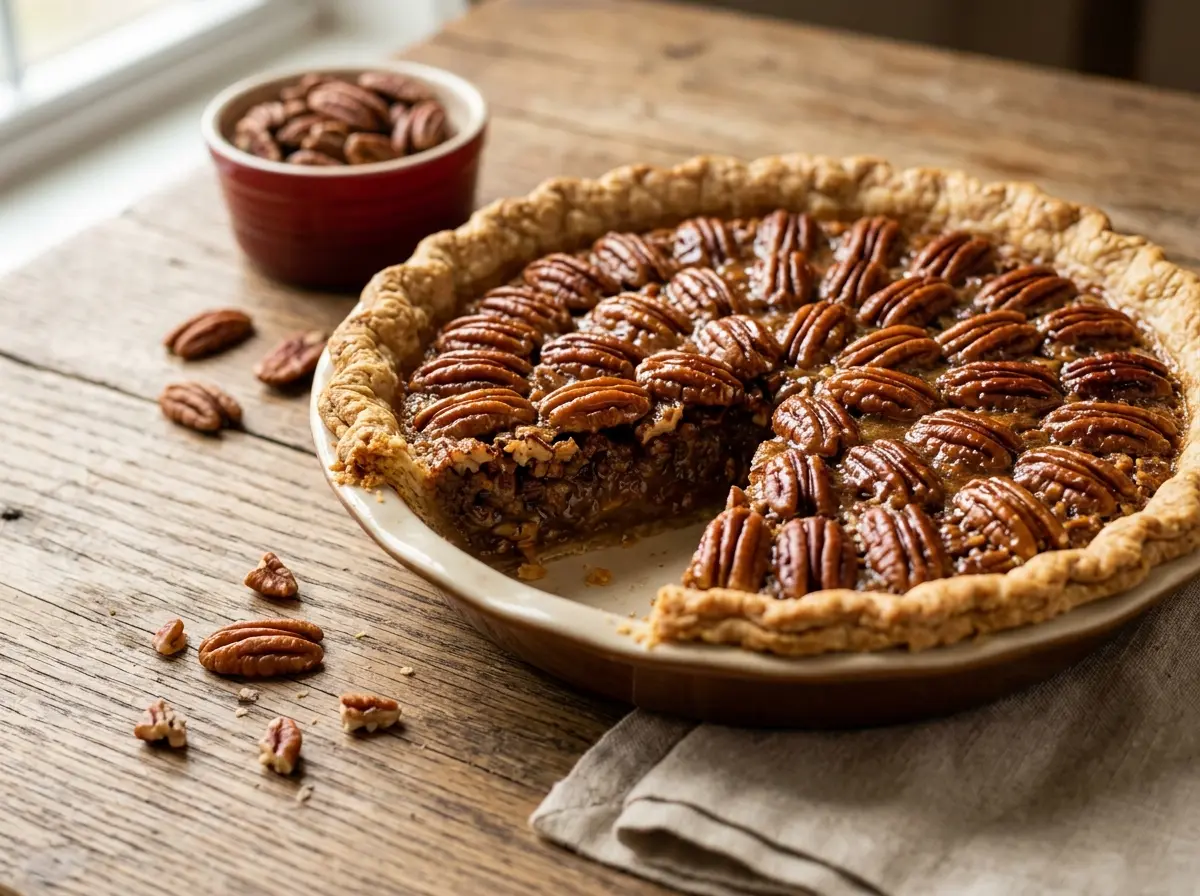
This maple pecan pie brings together the rich sweetness of pure maple syrup with toasted pecans in a flaky, buttery crust. Unlike traditional versions that rely on corn syrup, this recipe showcases the natural complexity of maple syrup for a more sophisticated flavor profile. The result is a dessert that feels both nostalgic and elevated, perfect for special occasions or whenever you crave authentic homemade comfort.
The silky filling develops a perfect custard-like texture as it bakes, while the pecans create beautiful caramelized edges. Each slice reveals layers of amber sweetness balanced by the nuts’ earthy richness. The aroma alone will fill your kitchen with warmth and anticipation.
Introduction
Pecan pie holds a cherished place in American dessert traditions, but this homemade pecan pie version elevates the classic with natural ingredients. By swapping corn syrup for pure maple syrup, you’ll discover deeper, more nuanced flavors that complement the pecans beautifully. This approach creates a dessert that feels both familiar and refreshingly different.
The maple syrup adds complexity beyond simple sweetness, bringing subtle caramel notes and a hint of woodsy depth. This transformation makes each bite more interesting and satisfying than conventional versions. The natural sugars in maple syrup also create a slightly different texture—smoother and more luxurious.
What Makes Maple Pecan Pie Special?
The magic lies in maple syrup’s unique composition of natural sugars and minerals. Unlike processed corn syrup, maple syrup contains trace amounts of manganese, zinc, and antioxidants that enhance both flavor and nutritional value. These compounds create a more complex sweetness that doesn’t overpower the pecans’ natural taste.
The viscosity of maple syrup also affects the final texture. It creates a filling that sets beautifully without becoming overly thick or gummy. The result is a custard-like consistency that slices cleanly while maintaining a slight give when you press your fork through it.
Benefits of Using Natural Maple Syrup
Pure maple syrup brings several advantages to pie-making beyond flavor enhancement. Its natural moisture content helps create a tender filling that doesn’t crack during cooling. The syrup’s mineral content also contributes to better browning, giving your pie that gorgeous golden appearance.
From a culinary science perspective, maple syrup’s fructose and glucose balance creates better binding with eggs and cream. This results in a more stable emulsion that holds together beautifully when sliced. The natural sugars also caramelize at slightly different temperatures, adding depth to the overall flavor profile.
Ingredients
Essential Ingredients and Quality Tips
Quality ingredients make the difference between a good pie and an exceptional one. Choose Grade A Dark maple syrup for the most robust flavor—it provides the perfect balance of sweetness and complexity. The darker grades contain more concentrated maple compounds that shine in baked applications.
Fresh pecans are crucial for the best texture and taste. Look for plump, uniform halves without dark spots or rancid odors. Store them in the freezer until ready to use, as this preserves their oils and prevents staleness. Toasting the pecans lightly before adding them enhances their nutty flavor significantly.
For the custard base, use room temperature eggs and heavy cream. Cold ingredients can cause the filling to curdle or set unevenly. Real vanilla extract adds aromatic depth that complements the maple beautifully—avoid imitation versions that taste harsh against the syrup’s subtle notes.
Substitution Options for Dietary Needs
Creating a gluten-free maple pecan pie requires swapping regular flour for a 1:1 gluten-free baking blend in the crust. Almond flour mixed with a small amount of tapioca starch also works excellently and adds complementary nutty notes. Ensure your maple syrup is certified gluten-free, as some processing methods may introduce cross-contamination.
For vegan alternatives, replace eggs with a mixture of ground flaxseed and water (3 tablespoons water plus 1 tablespoon ground flax per egg). Substitute heavy cream with full-fat coconut milk for richness. Use vegan butter in the crust and ensure your maple syrup is processed without animal-derived filtering agents.
Natural sweetener variations include pure honey or brown rice syrup, though these will alter the flavor profile slightly. Coconut sugar can replace some of the maple syrup for a deeper molasses note. Each substitution creates a unique twist on the classic recipe while maintaining the essential character.
Equipment Needed
A 9-inch pie pan with straight sides provides the ideal shape and depth for even baking. Glass or ceramic pans work best as they conduct heat evenly and allow you to monitor browning on the bottom. Metal pans heat quickly but can cause over-browning before the filling sets properly.
A large mixing bowl and wire whisk are essential for creating a smooth filling without lumps. An electric mixer helps incorporate air into the custard base, creating a lighter texture. Measuring cups with pour spouts make transferring the liquid filling much easier and cleaner.
Pie weights or dried beans help prevent crust shrinkage during blind baking. Parchment paper protects the crust from direct contact with weights. A kitchen thermometer ensures accurate oven temperature, which is critical for achieving the perfect custard consistency.
Step-by-Step Instructions
Preparing the Pie Crust
Begin with cold butter and ice water to ensure a flaky texture. Cut the butter into small cubes and keep it chilled until ready to mix. The contrast between cold fat and room temperature flour creates steam pockets during baking, resulting in those coveted flaky layers.
Work the butter into the flour mixture until you see pieces ranging from pea-sized to small flakes. This varied texture creates the best flakiness—too uniform and the crust becomes dense. Add ice water gradually while tossing with a fork, just until the dough holds together when squeezed.
Roll the dough between sheets of parchment paper to prevent sticking without adding excess flour. Excess flour toughens the crust and dilutes the buttery flavor. Transfer carefully to your pie pan and trim edges, leaving about an inch overhang for crimping.
Making the Maple Pecan Filling
Warm the maple syrup slightly before mixing—this helps it incorporate more easily with the eggs. Room temperature ingredients blend more smoothly and create a more homogeneous filling. Whisk the eggs first, then slowly add the warm syrup while whisking continuously to prevent scrambling.
The cream and vanilla should be added after the egg-syrup mixture is well combined. This sequence prevents lumps and ensures even distribution of flavors. Strain the mixture through a fine mesh if you notice any lumps—smoothness is key to professional results.
Fold in the toasted pecans gently to avoid breaking them into small pieces. Larger pecan pieces create better texture contrast and visual appeal. Reserve some perfect halves for arranging decoratively on top of the filling.
Assembling the Pie
Pour the filling into the prepared crust slowly to avoid splashing. Leave about ¼ inch of space at the top to prevent overflow during baking. The filling will puff slightly as it cooks, so this headroom is essential.
Arrange the reserved pecan halves in concentric circles or your preferred pattern on the surface. Press them gently into the filling so they’re partially submerged but still visible. This creates an attractive presentation while ensuring they don’t burn during baking.
Cover the crust edges with strips of aluminum foil to prevent over-browning. The filling needs longer to cook than the crust edges, so this protection is crucial. You can remove the foil during the last 10-15 minutes if you want deeper browning.
Baking Instructions with Temperature and Timing
Preheat your oven to 350°F for optimal results. This moderate temperature allows the custard to set evenly without curdling or creating a rubbery texture. Higher temperatures risk burning the surface before the center sets properly.
Bake for 50-60 minutes, checking for doneness starting at 45 minutes. The center should be just set with only a slight jiggle when you gently shake the pan. The surface will be golden brown with caramelized edges around the pecans.
A knife inserted halfway between the center and edge should come out clean or with just a few moist crumbs. The residual heat will continue cooking the center as the pie cools. Overbaking creates a tough, rubbery texture that’s difficult to slice cleanly.
Visual Cues and Troubleshooting
How to Recognize Perfect Filling Consistency
The ideal maple syrup pecan pie filling should have a glossy surface with no wet spots or pooling liquid. The pecans will appear slightly darker and caramelized around the edges. The filling should feel firm when gently pressed with a clean finger, springing back slightly.
Look for even browning across the surface without dark spots or pale areas. Uneven coloring indicates hot spots in your oven or improper positioning. Rotate the pie halfway through baking if you notice significant color differences developing.
The filling will puff slightly during baking, then settle as it cools. This is normal and indicates proper egg coagulation. If the filling puffs excessively or cracks, your oven temperature is too high—reduce by 25°F for future attempts.
Visual Doneness Indicators
A properly baked no corn syrup pecan pie will have a golden-brown surface with deeper brown caramelization around the pecans. The crust edges should be golden but not burnt. The filling should appear set rather than liquid or jiggly in the center.
Test doneness by gently shaking the pie pan. The center should move as one piece rather than rippling like liquid. A toothpick inserted near the center should come out with minimal filling clinging to it—completely clean indicates overbaking.
The surface may develop small hairline cracks as it cools, which is normal and doesn’t affect taste or texture. Large cracks indicate overbaking or too-high temperature. These visual cues help you achieve perfect results every time.
Common Issues and Fixes
If your filling appears too liquid after the recommended baking time, continue baking in 5-minute intervals until set. Some ovens run cool, requiring longer cooking times. Cover the surface with foil if the top browns too quickly while the center remains underdone.
Curdled or grainy filling usually results from adding hot syrup to cold eggs too quickly. Next time, temper the eggs by adding warm syrup gradually while whisking constantly. If this happens, strain the mixture through a fine mesh to remove lumps before baking.
Soggy bottom crust can be prevented by blind-baking the shell for 10-15 minutes before adding filling. Place the pie on the lowest oven rack to ensure bottom heat reaches the crust effectively. A pizza stone or baking steel underneath the pie pan also helps achieve crispy bottoms.
Make-Ahead and Storage Tips
How to Store Maple Pecan Pie
Store your cooled best pecan pie recipe covered at room temperature for up to 2 days. The filling is stable due to its high sugar content, but refrigeration extends freshness to 4-5 days. Cover tightly with plastic wrap or store in an airtight container to prevent absorption of other flavors.
Room temperature storage maintains the best texture—the filling stays creamy rather than firm. If refrigerated, let the pie sit at room temperature for 30-45 minutes before serving to restore optimal texture and flavor release. Cold pie masks the maple syrup’s subtle flavor notes.
Never leave the pie uncovered, as the surface can develop a skin or absorb odors. The natural oils in pecans can also turn rancid when exposed to air for extended periods. Proper storage preserves both texture and taste quality.
Freezing and Reheating Advice
Freeze whole pies wrapped tightly in plastic wrap, then aluminum foil, for up to 3 months. Individual slices can be frozen on a baking sheet, then transferred to freezer bags for convenient single servings. Label with the date and contents for easy identification.
Thaw frozen pie overnight in the refrigerator, then bring to room temperature before serving. Avoid thawing at room temperature, as this can create condensation that makes the crust soggy. Gradual thawing preserves texture and prevents weeping from the filling.
To refresh day-old pie, warm individual slices in a 300°F oven for 8-10 minutes. This restores the filling’s silky texture and brings back the maple aroma. Avoid microwaving, which can make the filling rubbery and heat unevenly.
Nutritional Information and Serving Suggestions
This easy pecan pie recipe pairs beautifully with lightly sweetened whipped cream or vanilla ice cream. The cool contrast balances the rich, sweet filling perfectly. For a more sophisticated presentation, try serving with a dollop of crème fraîche or a drizzle of additional maple syrup.
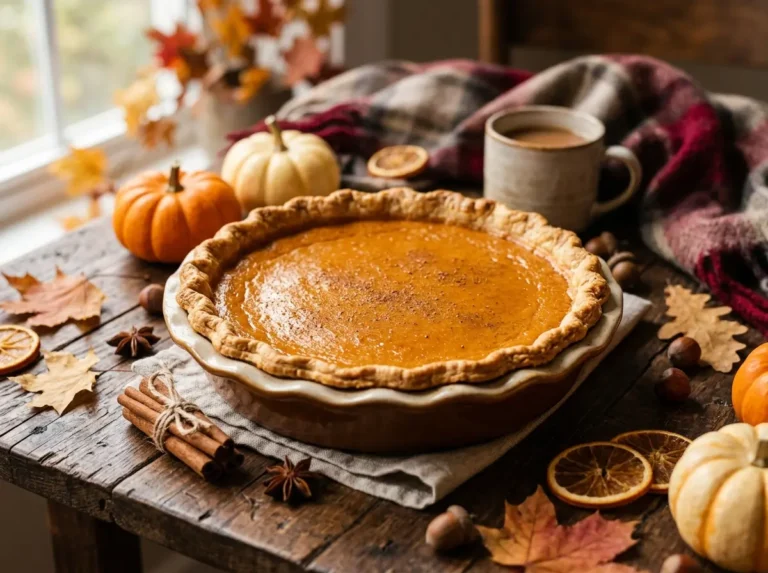
Consider serving alongside other fall desserts like classic pumpkin pie for variety. The different flavor profiles complement each other beautifully on a dessert table. Mini portions work well for dinner parties where guests want to sample multiple desserts.
Coffee or black tea makes an excellent beverage pairing, as the slight bitterness balances the pie’s sweetness. Hot cider or chai tea also complement the maple and spice notes beautifully. For special occasions, consider pairing with dessert wines or port.
Maple Pecan Pie
Equipment
- 9-inch pie dish
- Large mixing bowl
- Whisk
- Measuring cups and spoons
- Pie weights or dried beans
- Parchment paper
- Kitchen scale (optional)
Ingredients
- 1¼ cups whole wheat pastry flour or all-purpose flour
- ½ teaspoon salt
- 6 tablespoons unsalted butter cold, cubed, or vegan butter alternative
- 3-4 tablespoons ice water
- 3 large eggs room temperature
- 1 cup pure maple syrup Grade A Dark Robust or Grade A Amber Rich preferred
- 2 tablespoons unsalted butter melted and cooled slightly
- 1 teaspoon pure vanilla extract alcohol-free preferred
- ¼ teaspoon salt
- 1½ cups pecan halves organic preferred, lightly toasted
Instructions
- In a large mixing bowl, whisk together flour and salt. Add cold butter cubes and use your fingers or a pastry cutter to work butter into flour until mixture resembles coarse crumbs with some pea-sized pieces.
- Sprinkle 3 tablespoons ice water over mixture and gently stir with a fork. Add additional water 1 teaspoon at a time until dough just comes together when pressed. Form into a disk, wrap in plastic, and refrigerate for 30 minutes.
- Roll chilled dough on floured surface into 12-inch circle. Transfer to 9-inch pie dish, trim edges leaving 1-inch overhang, and crimp decoratively. Refrigerate while preparing filling.
- Preheat oven to 375°F (190°C). Line pie crust with parchment paper and fill with pie weights. Blind bake for 15 minutes, remove weights and parchment, then bake 5 more minutes until lightly golden.
- In a large bowl, whisk eggs until smooth. Add maple syrup, melted butter, vanilla extract, and salt, whisking until well combined and no streaks remain.
- Arrange pecan halves in an even layer in the partially baked crust. Pour maple mixture over pecans, ensuring even distribution. Gently tap pie dish to release air bubbles.
- Reduce oven temperature to 350°F (175°C). Bake pie for 35-40 minutes until center is just set but still slightly jiggly when gently shaken. The filling should not be completely firm as it will continue cooking from residual heat.
- Cool completely on wire rack for at least 3 hours before slicing. The filling will firm up as it cools to room temperature.
Notes
Nutrition Highlights (Per Serving – Approximate)
Understanding your food’s composition is key to balanced eating. Here is an approximate nutritional breakdown calculated for a standard serving based on wholesome preparation guidelines:
Culinary Selection Notes
- Adjusting sweetener densities or using refined-sugar alternatives will directly optimize the overall glycemic load without breaking structural balance.
- Focusing on high-quality whole fats maximizes trace micronutrient retention across low-temperature or baking environments.
Frequently Asked Questions
Can I make maple pecan pie from scratch without corn syrup? Absolutely! This recipe demonstrates that pure maple syrup creates superior flavor and texture compared to corn syrup. The natural sugars in maple syrup provide better binding and create a more luxurious mouthfeel.
How do I prevent my pie crust from getting soggy? Blind-bake the crust for 10-15 minutes before adding the filling. This creates a barrier that prevents liquid absorption. Also ensure your oven rack is positioned in the lower third for adequate bottom heat.
Can I substitute other nuts for pecans? Walnuts work excellently and provide a slightly more assertive flavor. Toasted hazelnuts or almonds also create delicious variations. Use the same quantity and toasting method for best results.
What’s the difference between Grade A and Grade B maple syrup for baking? Grade A Dark (formerly Grade B) provides more robust maple flavor that stands up to baking. The darker grades contain more concentrated maple compounds that enhance the final taste significantly.
How can I tell if my pie is properly set? The center should jiggle slightly when gently shaken but move as one piece rather than rippling. A knife inserted near the center should come out with minimal filling attached. The surface should be golden brown without wet spots.
Can I make mini maple pecan pies instead? Yes! Use a standard muffin tin and reduce baking time to 20-25 minutes. Mini versions are perfect for portion control and entertaining. Check doneness using the same visual cues as the full-size version.
Conclusion
Summary of Key Points
This maple pecan pie showcases how natural ingredients create superior desserts. By using pure maple syrup instead of corn syrup, you achieve deeper flavors and better texture while supporting more wholesome baking practices. The natural sugars and minerals in maple syrup enhance both taste and nutritional value.
Proper technique ensures perfect results every time. Temperature control, quality ingredients, and attention to visual cues make the difference between good and exceptional pie. The make-ahead capabilities also make this dessert practical for entertaining and meal planning.
Understanding the science behind custard setting and caramelization helps you troubleshoot issues and achieve consistent results. These principles apply to many other desserts, making you a more confident baker overall.
Encouragement to Try the Recipe
Don’t let pie-making intimidate you—this recipe breaks down each step clearly for success. The natural sweetness of maple syrup makes this version more approachable and sophisticated than traditional recipes. Your family and friends will notice the difference immediately.
Start with quality ingredients and follow the visual cues for doneness. Even if your first attempt isn’t perfect, the flavors will still be delicious. Each time you make it, you’ll gain confidence and improve your technique.
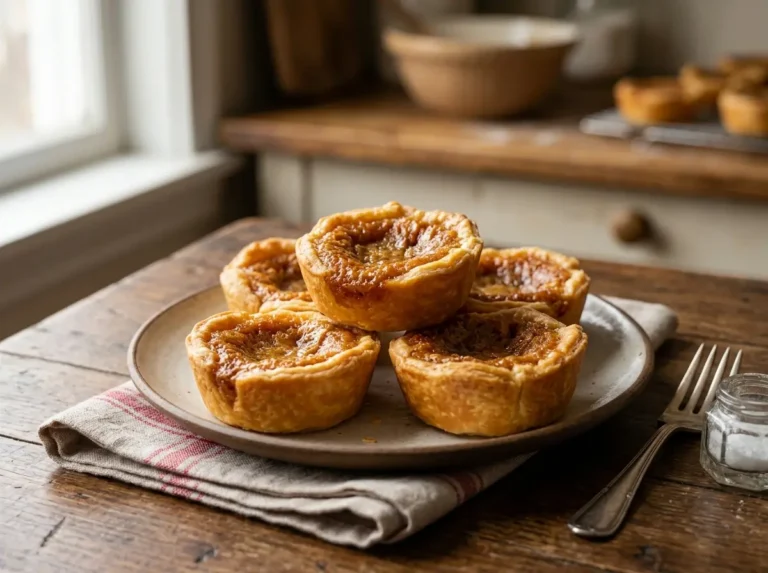
Consider trying variations like butter tarts or exploring other pie crust techniques to expand your dessert repertoire. The skills you develop making this pie will serve you well in countless other baking projects.