Butter Tarts Recipe: Easy Homemade Tarts with Gooey Filling
Learn how to make perfect butter tarts with our foolproof recipe featuring a flaky crust and gooey filling. Start baking today!
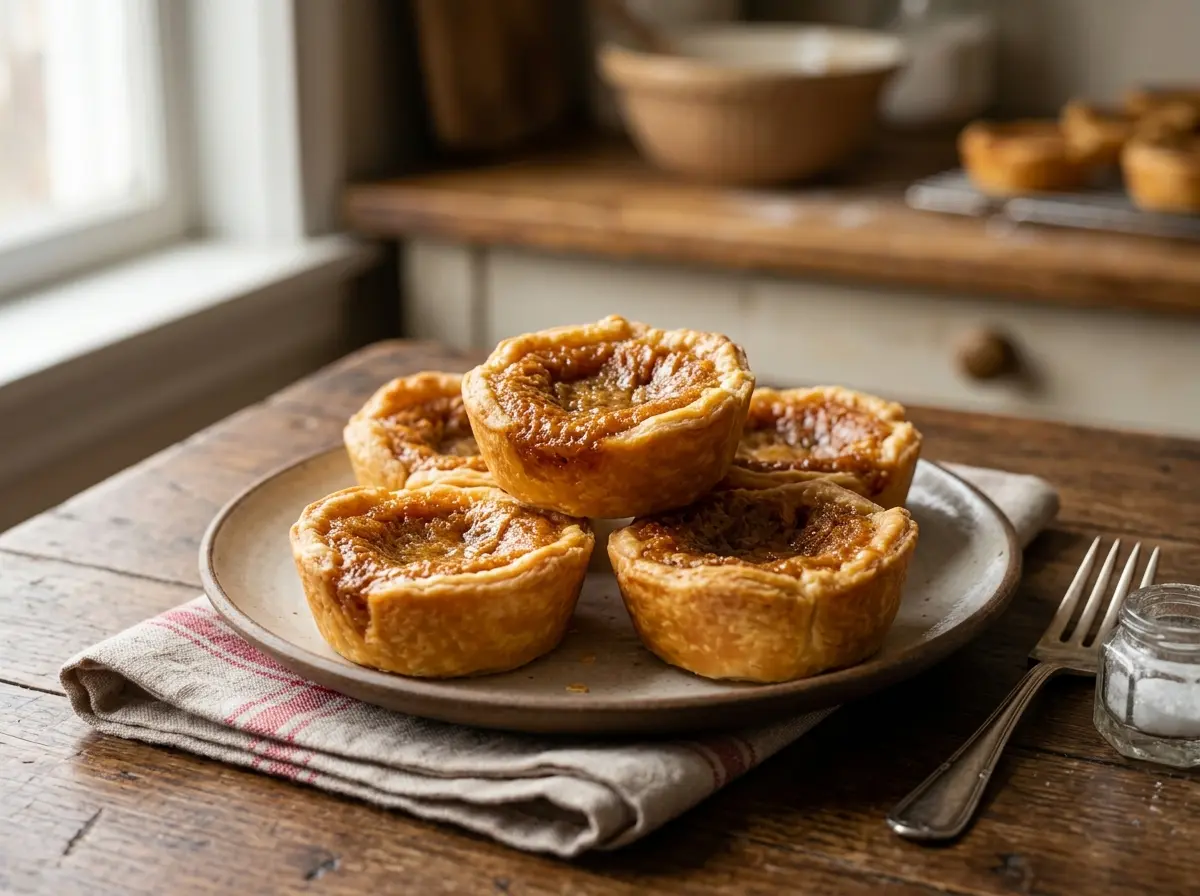
Butter tarts represent one of Canada’s most beloved dessert traditions, combining flaky pastry shells with a rich, gooey filling that strikes the perfect balance between sweet and indulgent. These golden treats have graced Canadian tables for over a century, captivating taste buds with their signature caramelized interior and tender crust. Whether you’re seeking an authentic taste of Canadian heritage or simply craving a dessert that delivers maximum comfort in every bite, mastering this classic recipe opens the door to countless sweet memories.
The magic of homemade butter tarts lies in their textural contrast—crisp, buttery pastry giving way to a molten center that’s neither too runny nor overly firm. Each bite reveals layers of maple sweetness, rich butter notes, and optional bursts of raisins or pecans that add delightful complexity. The aroma alone, wafting from your oven as these beauties bake, transforms any kitchen into a cozy bakery filled with warmth and anticipation.
Introduction to Butter Tarts
The story of Canadian butter tarts stretches back to the early 1900s, when resourceful home bakers transformed simple pantry staples into extraordinary desserts. These sweet treats emerged from a tradition of making the most of available ingredients—butter, brown sugar, eggs, and basic pastry—creating something far greater than the sum of their parts. Regional variations developed across different provinces, with some families swearing by raisins while others preferred pecans or kept their fillings purely smooth.
History and Canadian Heritage
Historical records suggest that early French-Canadian settlers may have inspired the original concept, though the modern version we know today became distinctly Canadian through generations of adaptation. Pioneer women would often prepare large batches during harvest seasons, storing them as special treats for long winter months. The dessert gained national recognition when it appeared in various Canadian cookbooks throughout the mid-20th century, cementing its status as an iconic national sweet.
Different regions developed their own signature touches over time. Maritime provinces often favored adding a touch of maple extract, while Western Canada embraced heartier fillings with chopped walnuts or pecans. These regional preferences continue to influence modern interpretations, making each family’s version slightly unique while maintaining the core characteristics that define authentic Canadian butter tarts.
What Makes a Perfect Butter Tart
A truly exceptional butter tart achieves harmony between multiple textural and flavor elements. The pastry must be tender yet sturdy enough to contain the filling without becoming soggy. The ideal filling strikes a delicate balance—set enough to hold its shape when bitten, yet still slightly gooey in the center for that signature molten experience.
Temperature control during baking plays a crucial role in achieving this balance. Too high heat causes the filling to bubble aggressively and potentially crack, while insufficient heat results in an undercooked center that never develops the proper caramelized depth. The perfect butter tart emerges from the oven with a golden-brown top that’s slightly puffed but not burnt, indicating proper caramelization without overcooking.
Ingredients Overview
Understanding each ingredient’s role in butter tart construction helps you make informed substitutions and achieve consistent results. The foundation begins with quality pastry flour for the crust, which provides the right protein content for tender yet structurally sound shells. Brown sugar forms the filling’s backbone, contributing both sweetness and the characteristic molasses notes that distinguish these tarts from other custard-based desserts.
Traditional Ingredients Explained
Butter serves double duty in this recipe, enriching both the pastry and filling with its creamy richness. Using room-temperature butter ensures proper incorporation in the pastry dough, while melted butter in the filling creates the smooth, pourable consistency that bakes into that coveted gooey texture. Fresh eggs act as the primary binding agent, with their proteins coagulating during baking to set the filling structure.
Corn syrup traditionally appears in many classic recipes, contributing to the filling’s glossy finish and helping prevent crystallization as the mixture cooks. However, many home bakers successfully substitute maple syrup, which adds distinctive Canadian flavor notes while maintaining similar textural properties. Pure vanilla extract rounds out the flavor profile, though halal bakers should seek vanilla bean paste or pure vanilla powder to avoid alcohol-based extracts.
Salt might seem minor, but it’s essential for balancing the sweetness and enhancing all other flavors. A pinch in both the pastry and filling prevents the final product from becoming cloying while highlighting the butter’s natural richness.
Alternative Ingredients for Dietary Needs
Modern dietary requirements have sparked creative adaptations that maintain the essential butter tart experience. Gluten-free flour blends work exceptionally well in the pastry, though adding a binding agent like xanthan gum ensures proper texture. Almond flour can partially replace traditional flour for added richness and protein content.
Dairy-free versions substitute coconut oil or high-quality vegan butter, though the flavor profile shifts slightly toward tropical notes. Those avoiding refined sugars often use coconut sugar or date syrup, which provide similar caramelization properties while adding subtle flavor complexity. Plant-based egg replacers work adequately, though the filling may have a slightly different texture than traditional versions.
Step-By-Step Baking Method
Success with butter tarts depends heavily on proper technique and timing throughout each phase of preparation. The process divides into distinct stages—pastry preparation, filling creation, assembly, and baking—each requiring specific attention to detail. Understanding the science behind each step helps troubleshoot issues and consistently produce bakery-quality results at home.
Preparing the Shortcrust Pastry
Proper pastry begins with keeping ingredients cold and avoiding overworking the dough. Cold butter creates steam pockets during baking, resulting in the flaky layers that make great tart shells. Mix flour and salt first, then cut in cold butter using a pastry cutter or food processor until the mixture resembles coarse breadcrumbs with some larger butter pieces visible.
Ice water binds the dough without activating gluten excessively. Add liquid gradually, mixing just until the dough holds together when pressed. Overhydration leads to tough pastry, while insufficient moisture causes cracking during rolling. The finished dough should feel slightly tacky but not sticky, holding its shape without crumbling apart.
Chilling the formed dough for at least 30 minutes allows gluten to relax and butter to firm up again. This rest period makes rolling significantly easier and prevents shrinkage during baking. Well-chilled dough rolls out smoothly without tearing and maintains clean edges when cut into circles for the tart shells.
Making the Gooey Butter Filling
The filling requires gentle handling to maintain its smooth, lump-free consistency. Start by melting butter completely, then allow it to cool slightly before adding other ingredients. Hot butter can scramble the eggs, creating an undesirable grainy texture that won’t smooth out during baking.
Brown sugar should be packed firmly when measuring to ensure consistent sweetness levels. Whisk the sugar into the cooled melted butter until fully dissolved, creating a smooth base for the remaining ingredients. This step prevents sugar granules from remaining undissolved in the final filling, which can cause uneven textures.
Beat eggs lightly before incorporating them into the butter-sugar mixture. This preliminary beating ensures even distribution throughout the filling without creating excessive air bubbles that might cause the filling to puff and crack during baking. Strain the finished filling if any lumps remain, ensuring silky-smooth results.
Assembling the Tarts
Proper assembly prevents common issues like soggy bottoms or overfilled shells. Line each tart shell carefully, ensuring even thickness and no air pockets between the pastry and pan. Trim excess pastry, leaving just enough to create a small rim that prevents filling from overflowing during baking.
Fill shells only two-thirds full, allowing room for the mixture to bubble and expand during baking. Overfilled tarts invariably overflow, creating cleanup issues and potentially burning on the oven floor. If adding raisins or nuts, distribute them evenly among the shells before pouring in the liquid filling.
A light brush of egg wash on the pastry edges creates beautiful golden browning and helps seal the crust. This extra step elevates the visual appeal significantly and provides a professional bakery appearance that impresses guests and family alike.
Baking Tips and Oven Temperature Guide
Oven temperature accuracy makes the difference between perfectly set fillings and disappointing results. Use an oven thermometer to verify your oven’s true temperature, as many home ovens run hot or cold by 25-50 degrees. Baking at 375°F (190°C) provides the ideal balance of crust browning and filling setting without overcooking either component.
Position the baking sheet in the lower third of the oven to ensure bottom crusts cook thoroughly while preventing top browning from happening too quickly. Rotating the pan halfway through baking promotes even cooking, especially in ovens with hot spots or uneven heat distribution.
Watch for visual cues rather than relying solely on timing. Properly baked easy butter tarts have golden-brown edges and slightly puffed, set centers that no longer jiggle when the pan is gently shaken. The filling should look glossy and caramelized but not dark brown or burnt around the edges.
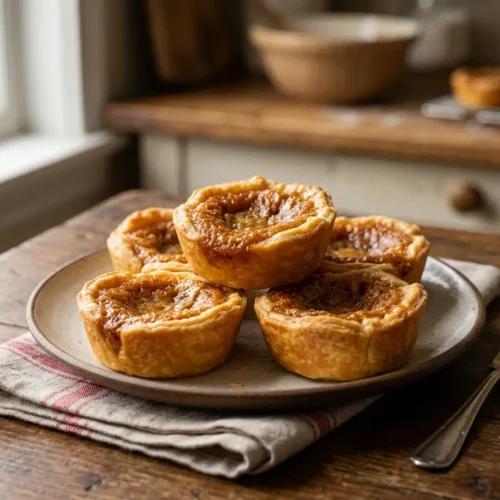
Classic Butter Tarts
Equipment
- 12-cup muffin tin
- Rolling Pin
- 4-inch round cookie cutter or glass
- Large mixing bowl
- Medium Mixing Bowl
- Wire whisk
- Measuring cups and spoons
- Pastry Brush
- Wire cooling rack
Ingredients
- 1¼ cups all-purpose flour plus extra for dusting
- ¼ teaspoon salt
- ⅓ cup cold unsalted butter cubed (or vegan butter substitute)
- 3-4 tablespoons ice water as needed
- ½ cup packed brown sugar coconut sugar works as healthier alternative
- ¼ cup pure maple syrup or corn syrup if preferred
- 2 tablespoons unsalted butter melted (or vegan butter substitute)
- 1 large egg or flax egg for vegan option (1 tbsp ground flaxseed + 3 tbsp water)
- 1 teaspoon pure vanilla extract
- 1 pinch salt
- ⅓ cup raisins or chopped pecans optional, or sunflower seeds for nut-free
Instructions
- Preheat oven to 425°F (220°C). Grease a 12-cup muffin tin with butter or cooking spray.
- In a large bowl, whisk together flour and salt. Cut in cold butter using pastry cutter or two knives until mixture resembles coarse crumbs with some pea-sized pieces.
- Gradually add ice water, 1 tablespoon at a time, mixing gently with a fork until dough just comes together. Do not overmix.
- Turn dough onto lightly floured surface and gently knead 2-3 times. Form into a disk, wrap in plastic wrap, and chill for 15 minutes.
- On floured surface, roll pastry to ⅛-inch (3mm) thickness. Cut into 4-inch (10cm) rounds using cookie cutter or glass rim.
- Gently press pastry rounds into muffin cups, ensuring pastry comes up sides. Trim excess, leaving ¼-inch overhang. Prick bottoms with fork.
- In medium bowl, whisk together brown sugar, maple syrup, and melted butter until smooth.
- Beat in egg (or flax egg), vanilla extract, and salt until well combined. Mixture should be smooth and glossy.
- If using raisins, pecans, or seeds, stir them into the filling mixture.
- Divide filling evenly among pastry shells, filling each about ⅔ full. Do not overfill as mixture will bubble up during baking.
- Bake for 12-15 minutes until pastry is golden brown and filling is bubbling vigorously. Centers should still jiggle slightly when gently shaken.
- Remove from oven and let cool in pan for 5 minutes. The filling will continue to set as it cools.
- Carefully remove tarts from muffin tin using a knife to loosen edges. Transfer to wire rack to cool completely.
Notes
Pastry should be golden brown and filling should bubble vigorously around edges. Centers will still jiggle slightly when done - they continue setting as they cool. STORAGE:
Store covered at room temperature for up to 3 days or refrigerate for up to 1 week. For longer storage, freeze for up to 3 months. REHEATING:
Warm individual tarts in 300°F oven for 5-7 minutes to restore gooey texture. Microwave 10-15 seconds for quick warming. TROUBLESHOTING:
If filling leaks through pastry, ensure no cracks in dough and don't overfill. If tarts stick to pan, let cool completely before removing and use well-greased muffin tin.
Nutrition Highlights (Per Serving – Approximate)
Understanding your food’s composition is key to balanced eating. Here is an approximate nutritional breakdown calculated for a standard serving based on wholesome preparation guidelines:
Culinary Selection Notes
- Adjusting sweetener densities or using refined-sugar alternatives will directly optimize the overall glycemic load without breaking structural balance.
- Focusing on high-quality whole fats maximizes trace micronutrient retention across low-temperature or baking environments.
Tips for Perfect Butter Tarts
Achieving consistent results requires understanding the common pitfalls and how to avoid them. Temperature management throughout the entire process—from ingredient preparation through final baking—significantly impacts the final texture and appearance. Many baking failures stem from rushing these temperature-sensitive steps or skipping seemingly minor details that actually play crucial roles.
How to Avoid Runny or Overly Thick Filling
Filling consistency issues typically trace back to ingredient ratios or baking temperature problems. Runny fillings often result from insufficient egg content, underbaking, or using too much liquid sweetener. The proteins in eggs need adequate heat and time to coagulate properly, setting the filling structure while maintaining the desired gooey center.
Conversely, overly thick or rubbery fillings usually indicate too many eggs, overbaking, or excessive oven temperature. Monitor your tarts closely during the final minutes of baking, looking for the moment when the centers are just set but still slightly jiggly. They’ll continue cooking from residual heat even after removal from the oven.
Altitude affects baking significantly, particularly with custard-based fillings like these butter tarts. Higher elevations may require reducing liquid ingredients slightly and increasing baking temperature by 15-25 degrees to achieve proper setting. Keep detailed notes about adjustments that work in your specific environment for future reference.
How to Achieve Flaky Pastry Every Time
Flaky pastry depends on maintaining distinct layers of fat throughout the dough structure. Cold butter creates steam during baking, which lifts and separates these layers, creating the desired flakiness. Room temperature or melted butter eliminates this effect, resulting in dense, cookie-like crusts instead of light, flaky shells.
Proper mixing technique prevents overworking the dough, which develops gluten and creates tough pastry. Mix just until ingredients come together, leaving some visible butter pieces that will create additional flaky layers. The dough should look somewhat shaggy and rough rather than smooth and uniform.
Rolling technique affects final texture significantly. Roll from the center outward with steady, even pressure, rotating the dough frequently to maintain round shapes. Avoid pressing too hard, which can compress the butter layers, and dust with minimal flour to prevent sticking without adding excess flour that might toughen the pastry.
Variations on the Classic Recipe
Traditional butter tarts provide an excellent foundation for creative adaptations that accommodate different dietary needs and flavor preferences. These variations maintain the essential characteristics while introducing new elements that enhance rather than mask the classic appeal. Understanding the basic ratios allows confident experimentation while ensuring successful results.
Gluten-Free Butter Tarts
Gluten-free flour blends work remarkably well in tart pastry, often producing even more tender results than traditional wheat flour. Look for blends containing rice flour, potato starch, and tapioca flour for the best texture and handling properties. Add one teaspoon of xanthan gum per cup of flour blend if your chosen blend doesn’t already include it.
The key to successful gluten-free pastry lies in proper hydration and resting time. Gluten-free doughs often need slightly more liquid and benefit from longer chilling periods that allow the starches to fully hydrate. Don’t be alarmed if the dough feels different from wheat-based versions—it should still roll out smoothly and hold its shape well.
Almond flour can replace up to one-third of the total flour for added richness and protein content. This substitution creates slightly more delicate shells with a subtle nutty flavor that complements the sweet filling beautifully. Adjust liquid ingredients slightly if the dough becomes too wet with this addition.
Butter Tarts without Corn Syrup
Many home bakers prefer avoiding corn syrup for health or availability reasons, and several excellent substitutes maintain the desired filling texture. Pure maple syrup creates authentically Canadian flavor while providing similar viscosity and preventing crystallization during baking. Use slightly less maple syrup than the corn syrup amount, as it’s typically thinner in consistency.
Honey offers another natural alternative, though it will impart its own distinct floral notes to the final product. Light-colored honey works best, avoiding overpowering the butter and brown sugar flavors. Golden syrup, popular in British baking, provides neutral sweetness with similar textural properties to corn syrup.
For those avoiding all liquid sweeteners, increase the brown sugar content and add a tablespoon of cream or milk to maintain proper filling consistency. This adjustment creates slightly different caramelization patterns but still produces deliciously gooey centers that define great butter tarts.
Mini Butter Tarts
Mini butter tarts offer perfect portion control and elegant presentation for parties or gift-giving. Standard mini muffin tins work excellently, though specialized tart pans create more professional-looking results. Reduce the filling quantity proportionally—about one teaspoon per mini shell prevents overflow while ensuring adequate filling in each bite.
Baking time decreases significantly with smaller sizes, typically requiring 12-15 minutes instead of the standard 20-25 minutes for full-sized versions. Watch carefully for the same visual cues—golden pastry edges and just-set centers—rather than relying solely on timing adjustments.
Mini versions freeze exceptionally well and thaw quickly, making them perfect for unexpected guests or quick sweet treats. Consider making double batches and freezing half for future enjoyment, as the smaller size makes them disappear quickly once discovered by family members.
Storage and Make-Ahead Instructions
Proper storage techniques preserve both flavor and texture, allowing you to enjoy your homemade butter tarts for several days or even weeks when frozen. Understanding how different components respond to storage helps you choose the best methods for your specific needs and timeline. Fresh butter tarts taste best within the first few days, but proper handling extends their enjoyable lifespan significantly.
How to Store Butter Tarts for Best Freshness
Room temperature storage works well for butter tarts consumed within 2-3 days, especially in cool, dry climates. Store them in airtight containers with parchment paper between layers to prevent sticking and maintain crisp pastry bottoms. Avoid plastic wrap directly against the tarts, as condensation can make pastry soggy and affect filling texture.
Refrigerated storage extends freshness up to one week, though the pastry may lose some crispness. Bring refrigerated tarts to room temperature before serving, or warm them briefly in a low oven to restore some of the original texture. Cover loosely with foil during reheating to prevent overbrowning while allowing moisture to escape.
High humidity environments require more careful storage considerations. Consider using desiccant packets in storage containers or choosing refrigerated storage even for short-term keeping. The filling’s high sugar content makes these tarts particularly susceptible to humidity-related texture changes.
Freezing and Reheating Butter Tarts
Freezing provides excellent long-term storage, maintaining quality for up to three months when properly wrapped. Wrap individual tarts in plastic wrap, then place in freezer bags with labels and dates. This double-wrapping prevents freezer burn while allowing easy access to single servings as needed.
Thaw frozen butter tarts slowly in the refrigerator overnight for best texture retention. Room temperature thawing works for quicker service, but may result in slightly softer pastry. Never microwave frozen tarts, as this creates uneven heating that can make fillings dangerously hot while leaving pastry cold and soggy.
Reheating thawed tarts in a 300°F oven for 5-7 minutes restores much of the original texture and warmth. Place them on a baking sheet lined with parchment paper and monitor closely to prevent overbrowning. The goal is warming through rather than rebaking, so remove them as soon as they feel warm to the touch.
Make-ahead preparation works excellently with this recipe. Prepare and fill unbaked tart shells, then freeze them completely before transferring to freezer bags. Bake directly from frozen, adding 5-10 minutes to the standard baking time. This technique provides fresh-baked taste with minimal day-of preparation effort.
Nutritional Information and Healthier Substitutions
Understanding the nutritional profile helps you enjoy butter tarts as part of a balanced approach to eating. While these treats are undeniably indulgent, awareness of their nutritional content allows for mindful consumption and informed decision-making about portion sizes and frequency.
The primary nutrients come from butter, eggs, and flour, providing energy through fats and carbohydrates along with some protein content. The high sugar content makes these desserts calorie-dense, but they also provide some beneficial nutrients from quality ingredients like real butter and fresh eggs.
Several substitutions can improve the nutritional profile without significantly compromising taste or texture. Whole wheat pastry flour adds fiber and nutrients while maintaining tender pastry. Reducing sugar by up to 25% often goes unnoticed, especially when using flavorful alternatives like maple syrup or coconut sugar that provide additional taste complexity.
Consider these approaches to create lighter versions while maintaining the essential butter tart experience:
- Replace half the butter in the pastry with Greek yogurt for reduced fat and added protein
- Use a mixture of whole eggs and egg whites to reduce cholesterol while maintaining binding properties
- Incorporate finely ground almonds or oats into the pastry for additional nutrients and fiber
- Add vanilla bean paste instead of extract to intensify flavor without additional calories
Frequently Asked Questions (FAQs)
Why do my butter tarts leak during baking?
Leaking typically occurs from overfilled shells, cracks in the pastry, or insufficient sealing around the edges. Fill shells only two-thirds full and ensure pastry is properly pressed into pan corners without air pockets. Small cracks can be patched with excess pastry dough before filling.
Can I make the pastry dough in advance?
Yes, pastry dough actually improves with overnight refrigeration, allowing gluten to relax and flavors to develop. Wrap tightly in plastic wrap and refrigerate up to three days, or freeze for up to three months. Thaw frozen dough in the refrigerator overnight before using.
What’s the secret to getting the filling consistency just right?
The key lies in proper egg-to-liquid ratios and accurate oven temperature. Use room temperature eggs for better incorporation, and ensure your oven runs at the correct temperature. The filling should look slightly underset when you remove the tarts, as they continue cooking from residual heat.
How do I prevent soggy bottoms in my tart shells?
Blind baking the shells partially before adding filling helps create a moisture barrier. Alternatively, brush the bottom of each shell with beaten egg white before filling, which creates a protective coating that prevents sogginess during baking.
Can I substitute ingredients for dietary restrictions?
Many substitutions work well in this versatile recipe. Gluten-free flour blends, dairy-free butter alternatives, and egg replacers all produce acceptable results with minor texture variations. Experiment with small batches first to find combinations that meet your needs while maintaining the classic appeal.
Conclusion and Encouragement to Bake Your Own Butter Tarts
Mastering homemade butter tarts connects you to a rich tradition of Canadian baking while providing endless opportunities for creative adaptation and family bonding. The skills you develop through this recipe—proper pastry technique, custard preparation, and temperature management—transfer beautifully to countless other baking projects, building confidence and expertise in your kitchen endeavors.
Don’t be discouraged if your first attempts aren’t perfect; even experienced bakers sometimes encounter challenges with filling consistency or pastry texture. Each batch teaches valuable lessons about your specific oven, climate, and ingredient preferences. Keep detailed notes about what works in your environment, building a personalized approach that consistently delivers the results you enjoy most.
The joy of sharing warm, homemade maple syrup butter tarts with loved ones creates memories that extend far beyond the actual eating experience. Whether you’re celebrating Canadian heritage, exploring new baking skills, or simply craving something sweet and comforting, these classic treats reward your efforts with every golden, gooey bite.
Consider exploring our other beloved Canadian recipes, including cinnamon rolls with heavy cream for another indulgent breakfast treat. For those interested in fruit-based desserts, our fruit pizza recipe offers a colorful alternative, while our rhubarb pie with perfect flaky crust provides additional pastry-making practice and seasonal fruit enjoyment.